HMS Wildfire
From Subterranea Britannica
hms-wildfire
Description, Articles, Images, Maps
Contributed by Bob Jenner on 16/02/2008
Creation of Area Combined Headquarters
During 1937, with the threat of war imminent, an exchange of letters between the Admiralty, Air Ministry and the War Office resulted in a policy for the provision of protected accommodation at the four main naval ports at Plymouth, Portsmouth, Chatham and Rosyth. It was decided that it would not be practicable or desirable to re-locate the Military HQ's to the coast so a small military liaison staff was allotted to each of the proposed HQ's which the Admiralty and Air Ministry now proceeded to plan and build.
The protection against air attack was particularly pertinent for the Navy at Chatham. During the later stages of WW1 on the night of 3rd September 1917, when 900 men were sleeping in the drill shed at the barracks of HMS Pembroke, 4 German Gotha bombers carried out the first night air raid on the UK. One of the planes dropped two 50 kg bombs through the glass roof of the drill shed killing 130 with 88 seriously injured. It was the largest single loss of life due to air raids in WW1. Large underground shelters were dug into the wall of the barracks before WW2 began.
The plan to build these Area Combined Headquarters (ACHQ's) involved the location of the Air Officer Commanding (AOC) No 15 Group, RAF Coastal Command with the naval Commander in Chief (C in C) Plymouth and Western Approaches at Mount Wise in Plymouth (HMS Drake). AOC No 16 Group, Coastal Command was located with the C in C Nore at Chatham (HMS Pembroke). Pitreavie Castle was to house the naval Flag Officer (FO) Rosyth (HMS Cochrane) and the AOC No 18 Group, Coastal Command.
The naval C in C Portsmouth (HMS Victory) was to relocate alone at Fort Southwick on Portsdown Hill. His area of command was covered by both No 15 (later No 19) and No 16 Groups. No 17 Group, Coastal Command at Gosport had a training role and no area responsibility. In August 1938 HQ Coastal Command moved from Wykeham House, Lee on Solent, Gosport to its new location at Eastbury House in Northwood, northwest London and subsequently in 1943 into its protected HQ. This site then went on to become HMS Warrior and later the Permanent Joint HQ (PJHQ).
Following the outbreak of hostilities and the occupation of northern Europe, adjustments were required in the above arrangements. In June 1940 the naval command at Plymouth was split, with a new C in C Western Approaches (HMS Eaglet) and the AOC No 15 Group moving north to Liverpool and into protected accommodation in Derby House in February 1941. The existing C in C Plymouth remained at Mount Wise where he was joined by the AOC of the newly formed No 19 Group to cover the South Western Approaches.
The design, size and construction of the five ACHQ's are all different. Those at Mount Wise, Fort Southwick and Pitreavie Castle are covered elsewhere on this web site.
The Nore Command
The title originates from the name of a large sandbank in the Thames Estuary at the mouth of the River Medway and has been associated with the navy for centuries. At the beginning of the war the command covered from Rye in Sussex to Yarmouth in Norfolk. When the ACHQ's were formed the northern boundary was moved north to Flamborough Head in Yorkshire taking over the Humber Sub Command from FO Rosyth on 13th December 1939 in order to conform with the area of No 16 Group RAF. Meanwhile in the south further changes were underway.
The C in C, Nore was normally a full Admiral's appointment, except in 1943 when Sir John Tovey, on being relieved as C in C, Home Fleet, was posted to the Nore on promotion to Admiral of the Fleet.
Rear Admiral Bertram Ramsay had resigned his appointment in 1934 and had been placed on half pay. He was promoted to Vice Admiral on seniority and was placed on the retired list in 1938. He was recalled as a retired officer and appointed to the staff of C in C, Nore and tasked with turning the commercial port of Dover into a naval base and headquarters. He established the HQ in the casemates of Dover castle alongside that of the army GOC Fixed Defences, Dover. Now Vice Admiral, Dover, Ramsay was responsible for the transportation, support and protection of the lines of communication of the BEF in France as well as the defence of the Straits of Dover. The events leading up to the fall of France and the British Expeditionary Force (BEF) evacuation at Dunkirk had caused the Dover Sub Command to be removed from the control of C in C, Nore and placed directly under Admiralty control. The Sub Command was not restored to Nore until 1946. The southern boundary of Nore Command was now a line due east of the North Foreland in Kent.
The Nore Command at Chatham had five major sub commands each under the command of a Flag Officer (normally a Rear or Vice Admiral). These sub commands were Chatham, London (less the Admiralty) Sheerness, Harwich and Humber. They were further sub divided into Bases under Naval Officers in Charge (NOIC) and Residential Naval Officers (RNO) Such bases included Gravesend, Southend, Queenborough, Brightlingsea, Yarmouth, Lowestoft, Felixstowe, Burnham-on-Crouch, Boston, Grimsby and Immingham.
Their prime responsibilities were the protection of East Coast convoys from air and sea attack, and the maintenance of the east coast barrier minefield. This involved the sweeping of enemy mines, standing anti U-Boat and E-Boat patrols, naval attacks on enemy shipping and Air/Sea Rescue. The assets for these tasks were in the main small ships, apart from the light cruisers of the 20th Cruiser Squadron during 1940, the force consisted of small Destroyers, Sloops, Trawlers and Motor Boats with MTB's and MGB's for offence. At its peak Nore Command had over 50,000 personnel with some 900 vessels operating from 35 different bases and all controlled through the sub commands from the ACHQ.
No. 16 Group RAF Coastal Command
On 10th September 1940 Coastal Command was placed under the operational command of the Admiralty in a similar manner as the Army AA Command being under the operational control of RAF Fighter Command.
The Air Officers Commanding (AOsC) at the ACHQ's were of Air Vice Marshal rank and therefore of a lower rank than their naval counterparts but were not subordinate to them. The area of No 16 Group matched that of the Nore in the north but stretched as far as Portsmouth in the south covering the now independent Dover Sub Command and the eastern half of Portsmouth Command.
AOC 16 Group had for his task (in1940) 8 Squadrons of light aircraft (Blenheim, Hudson, Anson, Beaufort, Swordfish and Albacore) flying from 6 airfields from Thorney Island in the south to Thornaby in the north. He was charged with co-operation with the Fleet, providing air cover as well as anti-submarine patrols, reconnaissance and air/sea rescue culminating in the protection of the eastern part of Operation Neptune, The D Day landings. The Group carried out this task until it was reduced to Wing status in 1946 but the RAF presence at the ACHQ (by now a Local HQ) continued until closure in 1962, the RAF personnel being accommodated in Anson Block at HMS Pembroke.
ACHQ Chatham
At Chatham (C in C Nore) a temporary ACHQ location unknown, but probably the newly built RAF No 16 Group HQ, camp and W/T station in Black Lion Fields, just to the southwest of Medway Road camp, was deemed suitable for emergency use until a permanent underground bomb-proof tunnelled ACHQ was completed in the chalk hill west of Admiralty House and to the south of the 'Lower Lines', an extension of the 'Great Lines', a series of dry moats built to defend the Chatham Dockyard. This project was contracted to Messrs Francois Cementation Co Ltd, the same company that built the Ramsgate Tunnel Shelters.
Whilst the tunnels were being constructed (22nd May 1939) the Civil Engineer in Chief (CE in C) at the Admiralty ordered that the floor of the Plotting Room be lowered by 2.5 feet, for better observation from the cabins (this being the approximate height of the plotting tables). The cost of the HQ was borne by the 3 services, against Vote 10 funding according to the amount of space allocated: RN 51%, RAF 45.5% Army 3.5%.
When built in December 1939 the HQ was designed to accommodate 60 officers and 90 ratings/other ranks of both services. By November 1940 this had increased to 63 officers and 119 ratings/other ranks, an increase of over 20%. Space was forever at a premium. No sleeping facilities were originally provided but rest rooms and a small galley (kitchen) was.
The majority of the personnel were the Commanders, Chiefs of Staff, Staff Officers and advisors together with signals and communications teams and the ubiquitous GPO (BT) staff. Both services had Wireless Telegraphy (W/T) facilities within the HQ. Two large wooden masts were on the surface above the HQ with the main Nore W/T station some one and a half miles away, north of the river Medway at Beacon Hill, Chattenden. This station was used between 26th March 1970 and 17th June 1970 to 'jam' the pirate radio station 'Radio North Sea International' on board the 'Mebo 2' off Frinton-on-Sea. The plotting duties were mainly carried out by WRNS although there was a full RAF presence. The Defence Teleprinter Network (DTN) terminal for the entire Chatham area was now located within the new HQ.
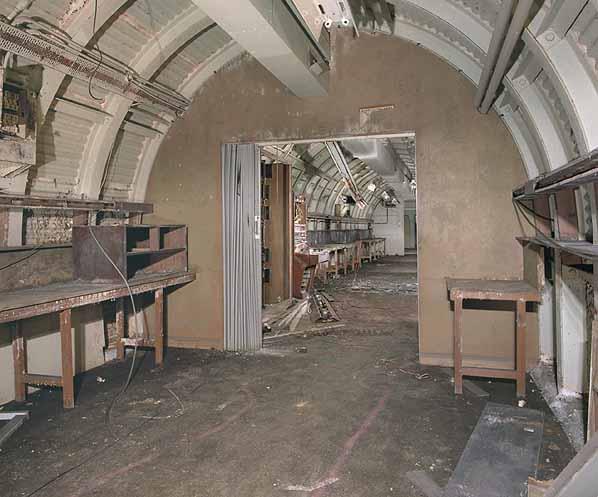
The ACHQ was constructed of steel mine hoops under corrugated iron sheeting with interior panelling, the plotting room being much larger with 40' diameter steel segments similar to the London Underground. The floor level of the tunnels entered the plotting room at first floor level, requiring steel stairs at each end to gain access to the plotting floor, which was effectively in a pit. A viewing platform overlooked the plotting table at the eastern end. The plotting room originally had three glass-fronted cabins at floor level, which became raised when the floor was lowered. These cabins now overlooked the plotting table and the vertical map boards opposite.
As a protection against blast, no tunnel had a direct line of sight from one end to the other, corridors moved from one side of the tunnel to the other and the one tunnel with no corridor (Signals and Teleprinter Rooms) had an office blocking the direct line. Each of the entrance tunnels also had a bend in them with an anti-gas airlock before entering the HQ. A 'Lamson' pneumatic message transmission system was also installed with a control room in Room 3 supplied with pressurised air from a pump room located at the bottom of the emergency exit and air supply shaft. Eight pairs of tubes have been found at the ACHQ, those rooms identified with a terminal were (original numbering): Room 42 Cipher Room, Room 43 Signals Office, Room 49 Organisation Office, Room 54 Cipher Staff Office, The Plotting Room and Admiralty House on the surface (well within Lamson range). The last two terminals remain unknown. As built, only chemical toilets were provided requiring a long and odorous emptying task.
Access to the complex was by way of 2 main entrance tunnels, the southern one from a small Nissen hut, within Medway Road Camp, itself off a private naval road leading to Admiralty House, the Naval Barracks (HMS Pembroke) and the Dockyard. This entrance was completely rebuilt during reconstruction work in 1957, which required the WRNS to enter via the Admirals' entrance where an armed sentry was posted. This, the northern entrance, was from the dry moat of St Mary's Barracks via a stairway, still extant, from the corner of the formal garden of Admiralty House. There was an emergency exit from the western plant area of the HQ, via three 20' ladders, that went up one of the two vertical air shafts that served both ventilation rooms and provided an exhaust for the emergency generator. This exit emerged in the dry moat to the west of the northern entrance.
After the war had ended the ACHQ, complete with a RAF component now accommodated in Anson Block of the naval barracks HMS Pembroke, continued to function with the clearing of both enemy and allied minefields being a major concern and still later conducting NATO exercises in the area.
In 1956 the Nissen hut entrance was replaced by a small brick building, although the adjacent large 24 foot Nissen hut was retained for recreational purposes. In 1961 the Nore Command and the title C in C was abolished, the Admiral Superintendent of the Dockyard (Chatham) assumed the role and title of Flag Officer, Medway. With the reduction of responsibility and area, the underground ACHQ was closed in 1962.
After the closure of the ACHQ and before the re-opening of the now Local Command HQ (LCHQ) in 1964 the plotting room was altered by the addition of three extra cabins. These were cantilevered above the existing three requiring the re-arrangement of stairs. Another addition was the provision of mains water services and sewage. This entailed the construction of a new chamber adjacent to the southern entrance to hold a large water tank, below this a sump was built with sewage ejection equipment enabling the toilets opposite to be connected to the mains and four extra toilets to be provided within the new room. The other two sets of toilets (each of two cubicles) situated beside the two ventilation plant rooms remained as chemical toilets as originally fitted.
Other changes involved the layout and size of the various rooms and corridors with partitions being moved and rooms enlarged, however the room numbering still ended at number 59, although on the original layout rooms 19 and 20 were not reconciled and this is the case with the current layout, domestic rooms, lavatories and plant were not included in this total (however, one plant room door does have the number 75 on it)
HMS Wildfire
The name Wildfire has long been associated with the Chatham area, the first six ships of the name being sailing warships. The name shifted ashore to the RN Barracks, Sheerness when it moved into an ex stores building in February 1854. This building became a Gunnery School in 1892. Sheerness then became a Naval Depot in 1908 but had closed by 1922. Wildfire was re-commissioned as a boys training establishment in1937. All boys training was transferred to the Isle of Man for the duration of the war. Used for accommodation during the war it amalgamated with HMS Vector to become Radar Plotter Training School in 1947. This school closed in 1949 when the function was transferred to HMS Dryad at Portsmouth and HMS Harrier at Kete in Pembrokeshire. From 1954 until 14th October 1959 Wildfire was the Sheerness Accommodation Centre.
During 1958 the Royal Naval Volunteer Reserve (RNVR) was absorbed into the Royal Naval Reserve (RNR). Among the new shore service roles for the RNR were the RNR HQ Units working in Maritime HQ's at the Major Ports. In 1963 the RNR established such a unit in the recently closed ACHQ at Chatham, being commissioned as HMS Wildfire on 10th September 1964.
The function of the unit was to provide a trained and stable staff for plotting and communications duties in the Flag Officer, Medway's operational headquarters now entitled Local Command Head Quarters (LCHQ) in time of war. Ratings were training in both of these trades, in addition Officers specialised in Naval Control of Shipping (NCS), Mine Counter Measure (MCM) and Intelligence duties. With the closure of Chatham as a naval base in 1983 the requirement for the HQ Unit ceased, with the resultant vacation and closure of the LCHQ and the tunnels.
If the RNR was to remain in the Chatham area a new site and a new function had to be found. The role was to be that of a Communications Training Centre (CTC) and the site selected was the then vacant Collingwood Block in nearby Khyber Road. This small complex of buildings began life at the beginning of the 20th century as the Royal Naval Detention Quarters, Chatham. (Naval Prison). This was closed in 1931 when all naval detention was transferred to Portsmouth. In 1932 the naval Mechanical Training Establishment (MTE) for Artificer training moved into the vacant premises and was named Fisguard Block. Collingwood Block was added at the same time. The whole lies directly over the large elaborate system of air raid shelters built for the naval barracks just before WW2 and referred to earlier. Air vents serving these shelters still appear at various locations in the area. By 1960 all Artificer training moved to Plymouth and the MTE became the Dockyard Technical College until July 1971 when this too closed.
Now called 'Medway CTC'-HMS Wildfire, the new HQ opened in December 1983 and was formally commissioned in October 1984. In 1988 yet another change of function took place, the unit now training Operations HQ staff. The latest change took place in 2000 when the name "HMS Wildfire" was transferred to the RNR unit at Northwood in northwest London to serve the Permanent Joint Headquarters (PJHQ) and the Medway unit became the Chatham Division of the London RNR. HMS President.
The Wildfire site has been on the 'must do' list for a long time. The recent acquisition of the Sub Brit Collection which contains a set of photographs of Wildfire, taken in July 1987, brought the subject to the fore. A casual reconnaissance of the area revealed a large active building site. Enquiry to the contractors led to the site owners, Mid Kent College, whose campus occupied the former Chatham Naval Barrack (HMS Pembroke) site. A need to extend the College and to provide student accommodation has resulted in the development of the area overlaying 'Wildfire' between Khyber Road and Cumberland Road. Following the granting of Planning Permission the College cut open a moat door to 'Wildfire' in August 2007 to conduct a pre-building survey. The door was resealed on completion.
At this time the College gave serious consideration to the possible utilisation of the HQ but all options proved to be prohibitively expensive. The present plan is to block the two moat entrances, each with a very large concrete block faced with brickwork matching the moat wall, this would ensure future access, albeit with the use of a large crane. The southern or main entrance has had the entrance building demolished and the tunnel blocked with building concrete and rubble. The two ventilation shafts have been capped with two large concrete slabs, semi-buried and landscaped over. The area over 'Wildfire' will be a large car park whilst the new accommodation blocks will be to the west towards Khyber Road. To the
north a new footbridge will cross the moat, giving direct access via a new staircase to the College. The remainder of the site will be landscaped and an open space/park created.
Tour of Tunnels
Our approach to Mid Kent College resulted in readily given permission to cut open, photograph and record the HQ and to re-seal it on completion.
Consultation with Kent Underground Research Group (KURG) who had the necessary equipment and experience to undertake entry and sealing led to a joint enterprise taking place on Saturday 16th February 2008 with two representatives of Canterbury Archaeological Society and a local historian in attendance. As the location was almost in the backyard of the new Kent Police Area HQ we made a courtesy call there. We had permission to remove a section of fence to allow vehicles carrying equipment into the moat and up to the doors. We were to enter by way of the original emergency exit which had had a large steel plate welded over it.
Cutting a large hole in this plate with a disc cutter revealed the original door which also had to be cut open, taking over two hours to complete, much longer than anticipated. Following a pause to allow the exhaust fumes from the generator to clear, an entry was made to meter the air quality. This being satisfactory, a descent down a set of steps led to a forty-two foot down-sloping ramp which breached a large vertical shaft some sixty feet above the floor of the bunker. This shaft extended upwards for a further twenty five feet, emerging on the high ground above the moat. Three, twenty foot ladders each ending on a small platform led to the bottom of the shaft, which apart from being one of two air shafts, contained an exhaust trunking for the emergency generator and various other services and cables. Descent of the ladders was very slow as only one person was allowed on the each ladder and platform at a time.
The shaft bottom has three sets of doors, (See enlarged sketch below) one pair on the north side led to the emergency generator room, and beyond that a further room still containing six large round diesel fuel tanks. These two rooms together with the main ventilation and filtering plant room are of mine hoop and corrugated iron construction. Returning to the shaft bottom, a small door in the west wall led to a brick built Lamson pump room complete with fan and large diameter circular trunks. The final door, in the south face, was the outer door of the airlock, leading into the tunnels. Each of the three entrances has an airlock at the entry point which, with overpressure in the bunker, prevents gas from entering. Once through this airlock, a door to the right is that of the aforementioned plant room, which is built of brick within the hooped tunnel. Passing the two chemical toilet cubicles we entered into the complex proper.
The main corridor goes both right and left, the former goes to the battery room (Room 1 on all plans), containing the wooden battery frames, this has a small brick annex behind it. The corridor turns ninety degrees to the left past this room into last room (Room 59), which will be returned to later. The corridor to the left goes into the heart of the complex, past a small fan space on the left, then offices (Rooms 2-6) Room 2 was the Commanding Officers office (CO), Room 3 is the Lamson control room. Another tunnel leads off to the right, opposite Room 3. Next Room 4 is a classroom 5 is unknown and 6 the Crypto Room. Beyond Room 6, we enter the double height, forty foot diameter, Plotting Room from the west end, onto a small square platform, leading from which is a long stair down to the plotting room floor, a shorter stair down to the lower cabin level and a short stair up to the front of the upper level cabins. Both levels have three glass- fronted cabins overlooking the plotting room. Beyond the eastern lower cabin is a small lobby with four steps down to the plotting floor and a stair up to what was originally a viewing platform leading to the rest of the tunnels. A further short stair led up to the front of the upper cabins in a similar fashion to the other end.
The upper cabins were a post war addition and are cantilevered out into the plotting room to allow for the curvature of the roof, which is now hidden by a false ceiling. Opposite the cabins are a series of full height map boards with a mezzanine floor behind, accessed by a further small staircase. Another full height map board is angled into the plotting room from the viewing platform forming a small room on the upper level used for record storage, with more storage below. A Lamson terminal is in this corner. A sadly distressed map table sits on the plotting room floor.
After closure in the mid 1980's, vandals gained access and started a fire in the plotting room, centred on the map boards and mezzanine floor, which as a result have badly charred beams and floorboards and are not safe to walk on. The surrounding area is scorched with considerable smoke deposits everywhere. The damage is however surprisingly slight. There is evidence of various other small fires at several locations. The tunnel continues past rooms 7 to 10, now classrooms and a store to the second ventilation and filter room with the second air-shaft to the surface and two more chemical toilets. Passing through an airlock, there is a long steeply sloping tunnel which doubles back 180 degrees on itself. This reaches a short staircase and a door exiting into the moat a short distance from the emergency exit door.
It should be noted that there are two different partial lists, of unknown dates, of post 1964 room titles; any description given here is only a guide and cannot be guaranteed. Retracing our steps to Room 9, a tunnel heads south with a corridor on the right hand side and offices 11 to 18 on the left. 11 to 13 are empty rooms, 14 has a blackboard at one end and shelving along one wall. Room 15 is a storeroom complete with desk shelves and cupboards and what appears to be an issue hatch into the next room, which is two rooms 16 and 17, knocked into one, this is labelled Receiver Room. Another tunnel leads off to the west opposite Room 15 more which later. The last Room in this corridor is Room 18, a small room, with a large telephone junction box on one wall and a hatch into Room 19. On reaching Room 18, a door to the right enters yet another cross tunnel. A door to the left takes you back into the previous tunnel and into Room 19 (once the W/T annex) now a classroom. The original corridor has been completely removed from this room which now occupies the full width of the tunnel. The north end has the hatch into Room 18 above three fitted communications desks. The other end of this room has two more hatches, one each side of a central door leading into Room 20
Room 20 is the first room along the southernmost tunnel, now a classroom, it has been enlarged by the removal of the walls of what was Room 21, the original 'Orderlies Room', it is also equipped with fitted communication desks and tables. Passing Room 22, the empty sickbay, the next room, 23, is a small galley with fitted sink and draining board and cupboards. Next, between Rooms 23 and 24 is a small fan space. Room 24 is listed as a fire fighting equipment store; this has a small washbasin annex at the end. The tunnel now widens with four toilet cubicles on the right and the main entrance on the left. Entering this tunnel through two gas air lock doors, it bends to the left and sloping steeply upwards, disappears into the distance. After sixty yards the tunnel is blocked with bricks, concrete blocks and building rubble. This would have led to the brick (formerly Nissen) entry guardhouse to the HQ, a turn to the left finds a door on the left, which has four more toilet cubicles, a urinal and wash place. Beyond this is another room with a very large water tank and below this a pit containing sewage ejection gear and sump. Continuing along the tunnel the next room 25 is listed as a store. This also has a small annex similar to that in Room 24, but in this case houses electrical equipment. The next two rooms 26 and 27 are inter-connected and used as a W/T workshop complete with workbenches.
Another tunnel now branches off to the right leading back to Room 3 and the door to Room 29. Continuing on, the corridor moves to right hand side of the tunnel. The first room, Room 48, another store, has the door from the lobby, not the corridor. The second room is the 1st Lieutenant's (XO) office. The next room, 50 is an Interview Room. The final two rooms in this corridor are the Telephone Exchange and its Battery Room (this latter room has also been labelled as a male changing room). Turning right for the last time on the outer ring, we find Rooms 53 Wardroom (Officer's Mess), 54 (empty) and 55 Store (also empty) which lead to GPO/BT territory. From here Room 56 is a workshop store, Room 58 is the main Defence Teleprinter Network (DTN) equipment room (still with a few racks in place) and finally is Power Room 59 next to where we started at Room 1.
Moving back to the southernmost corridor and room 29, another classroom, immediately on the right on entering is the door to Room 28 named Radio Stockroom. Going through a central door at the end of the classroom brings us to a unique room in that it is actually in two tunnels, with doors leading in three directions. This has been labelled 'Chief Communications Yeoman' (CCY), leaving this room by the northern door we re-enter the corridor, now on the right with six small empty offices on the left, Rooms 31 to 36. Room 34 was the Administration Office with an internal door through to Room 35 and Room 36 was the office of the Permanent Staff Instructor (PSI).
Retracing our steps back to Room 30, now leaving by the eastern door we enter a tunnel with two long rooms and a smaller one at the end (Rooms 45 to 47). The first two were teleprinter rooms with a folding door between them and the final room, the Main Signals Office (MSO). The T/P rooms held a double GPO 10 x 40 switchboard and an adjacent MDF. Both sides were fitted with operator's benches, still with electrical connections. There is a message hatch beside the door into the MSO, which contains a bench and a Lamson terminal. Of the two doors at the end of this room, the left one enters the eastern tunnel at Room 18 whilst the right one leads directly into Room 19.
The last tunnel runs parallel to the last mentioned one and runs from Rooms 37 to 44.
A short corridor leading east from Room 33 has three small empty rooms to the right, a door then enters a long, full width Conference Room with a further corridor leading off on the opposite side with two further rooms now on the left. The first one is numbered 41/42 and with two doors is another classroom. The next room, also a classroom is the final room on our tour; this room contains another Lamson terminal having been a signals office.
All in all the tunnels are in quiet a good condition, with very little damp, and not a lot of damage or graffiti. Most rooms are painted in cream or pale apple green and are basically clean.
Sources:
* Various National Archive files: ADM 1/1119 Combined HQ's 1937-41, ADM 1/10956 Chatham AHQ 1939-41, ADM 1/16263 Admin of Combined Ops in Nore Command 1944, AIR 28/ 304 16 Group RAF. ORB, AIR 16/ 58916 Wing RAF. ORB, AIR19/147 Protected Places (RAF) Order No 5 1941, AIR 15/ 4 Role of Coastal Command 1937-1940
* Q41 and beyond - Story of a Wren Telegraphist by Shirley Lawson
* Battle of the East Coast by J P Foynes
* Chatham Naval Dockyard and Barracks by David T Hughes
* Sheerness Naval Dockyard and Garrison by David T Hughes
* Shore Establishments of the Royal Navy by Lt Cdr B Warlow RN
* Coastal Command by Ian Carter (IWM)
* The Defence of the United Kingdom HMSO. Collier
* Royal Air Force Handbook 1939-45 by Chaz Bowyer
* British Barracks 1600-1914 by James Dovet
* Deserted Bastions Edited by Marianne Watson-Smyth
* Churchill's Navy. The ships, men and organisation by Brian Lavery
* The Royal Navy's Reserve in War and Peace by Stephen Howarth
* The Source Book of the RAF by Ken Delve
* The Cinderella Service. RAF Coastal Command 39-45 by Andrew Hendrie
 Subterranea 16 article
 ()
()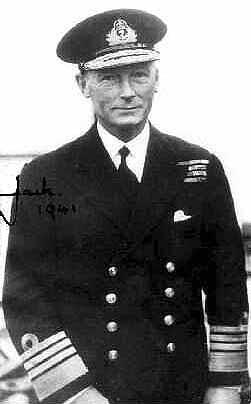 Admiral of the Fleet Sir John Tovey ()
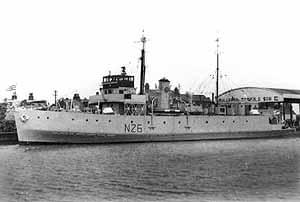 HMS Plover - This coastal minelayer was launched in 1936. Based at Harwich she carried 100 sea mines at a time, to build and maintain the east-coat barrier minefield. She was broken up in 1969. This was a typical vessel of the Nore Command. ()
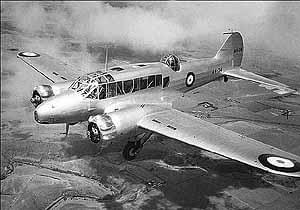 Avro Anson - (Faithful Annie) was a twin-engined light transport aircraft that came into service in 1936 and remained in service until 1969; nearly 1100 machines were built. Used for general reconnaissance (GR), training and light transport duties they formed the mainstay of Coastal Command during the early days of the war. ()
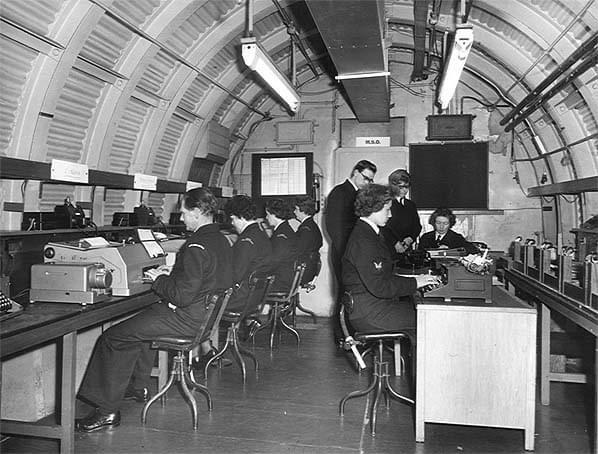
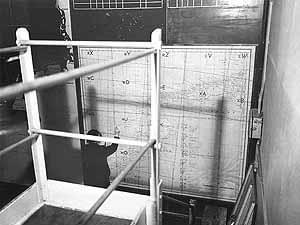 The ACHQ plotting room in WW2 - the wall maps seen from the viewing platform ()
 Beacon Hill W/T Station (Nick Catford)
 ()
() A view of the plotting room in WW2 looking east. Two officers are standing on the viewing platform discussing the plot. Note the telephone PMBX in the background under the stairs, also the cabin shown has no desk under the window ()
 ()
()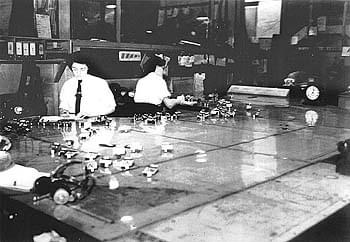 WW2 Main Plot looking west ()
 View of the plotting table in WW2 seen from the viewing platform ()
 ()
() ()
() Room 46, Teleprinter Room during the RNR 'Wildfire' period, looking towards the MSO (Room 47) ()
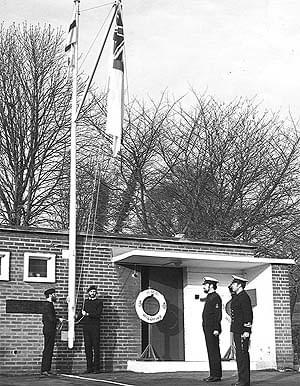 Evening Colours' the flag lowering ceremony taking place at the main surface entry building. The flags are, to the right, the 'White Ensign', flag of the Royal Navy and to the left the flag of the Flag Officer, Medway. the flag of St. George with 2 red balls in the outer corners ()
 ()
() Staff plotting on the main Plot and wall chart ()
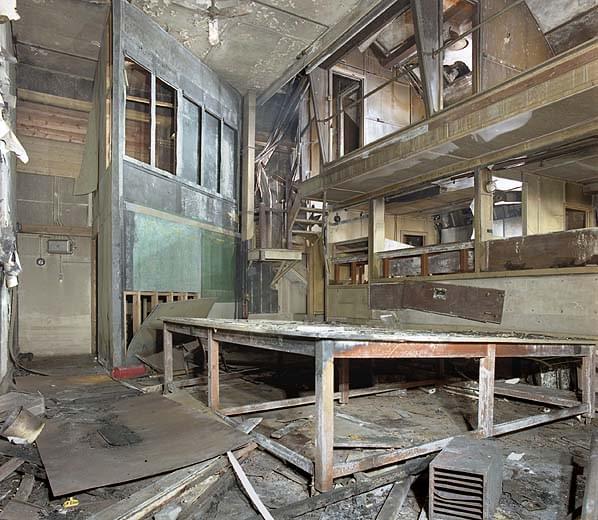 The Central Plotting Room at HMS Wildfire in February 2008. This well demonstrates the curved structure of the room as seen through the upper cabin windows and the false ceiling over the plotting area. The extent of the overhang of the later cabins is well illustrated. Despite the shabby derelict appearance of the room there is little structural damage. Note the charring on the edge of the plotting table (Nick Catford)
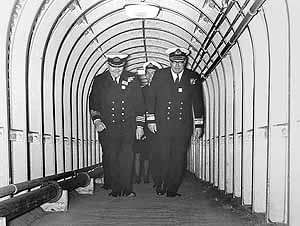 Flag Officer Medway leaving HMS Wildfire along the steeply sloping main entrance tunnel ()
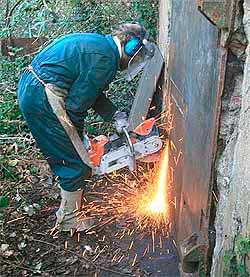 KURG's Paul Thorne cutting through the emergency exit door (Nick Catford)
 ()
() Room 34, The Teleprinter Room view from Room 30 through the folding doors. a GPO 10 X 40 PMBX switchboard and equipment racking can be seen on the left with operator benches beyond (Nick Catford)
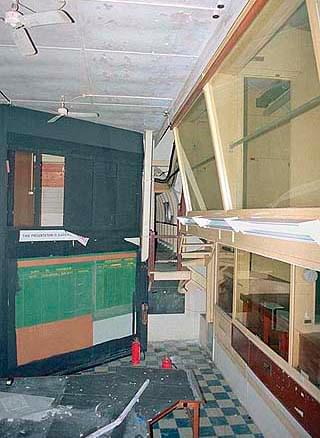 Ops Room' in 1987 (Sub Brit collection)
 ()
() ()
() Main ventilation plant room adjacent to the emergency exit shaft (Nick Catford)
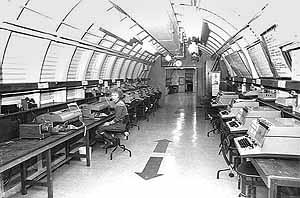 Teleprinter room in the Wildfire period ()
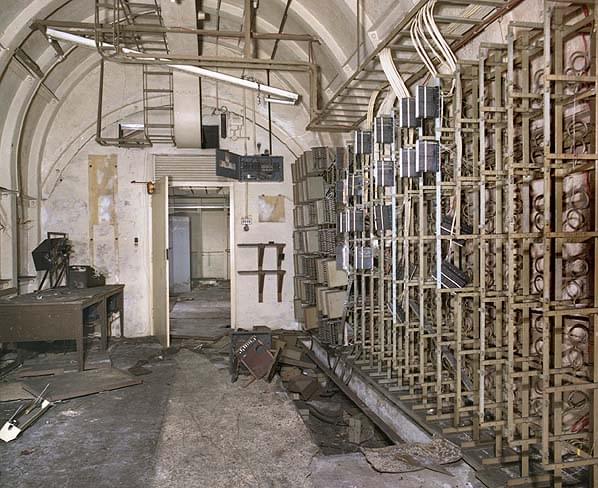 Main Distribution Frame (MDF) in the GPO/DTN Room (Nick Catford)
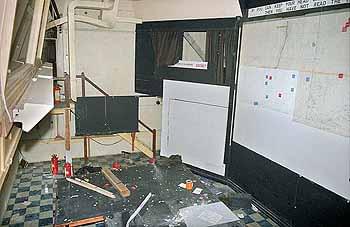 Ops Room in 1987 (Sub Brit collection)
 The 'Ops Room' seen from the upper level cabins (Nick Catford)
 Following our visit the hole in the door was repaired and a new steel plate was welded onto the door ()
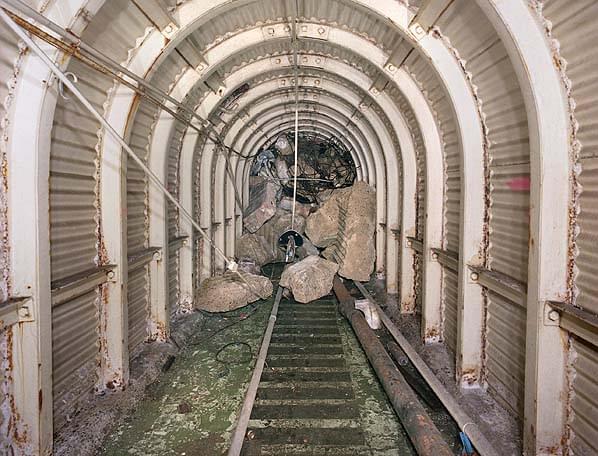 The main entrance tunnel now blocked with rubble from the demolished surface building (Nick Catford)
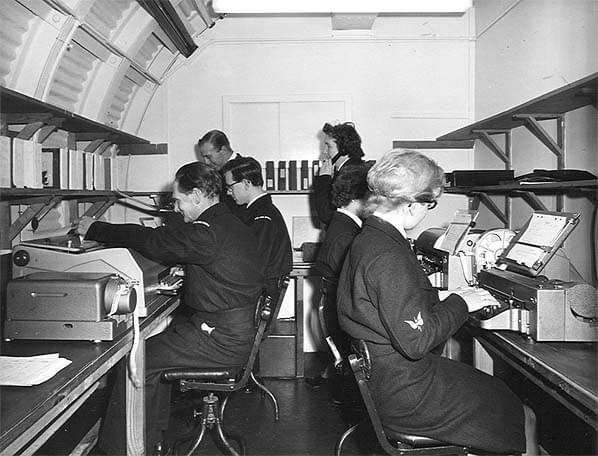 Tape Relay Centre in HMS Wildfire - exact location unknown ()
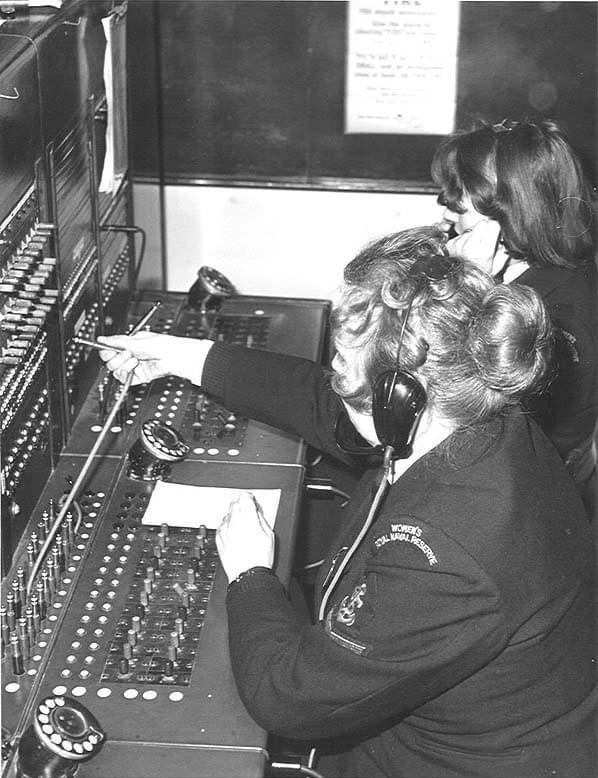 PMBX in Room 51 ()
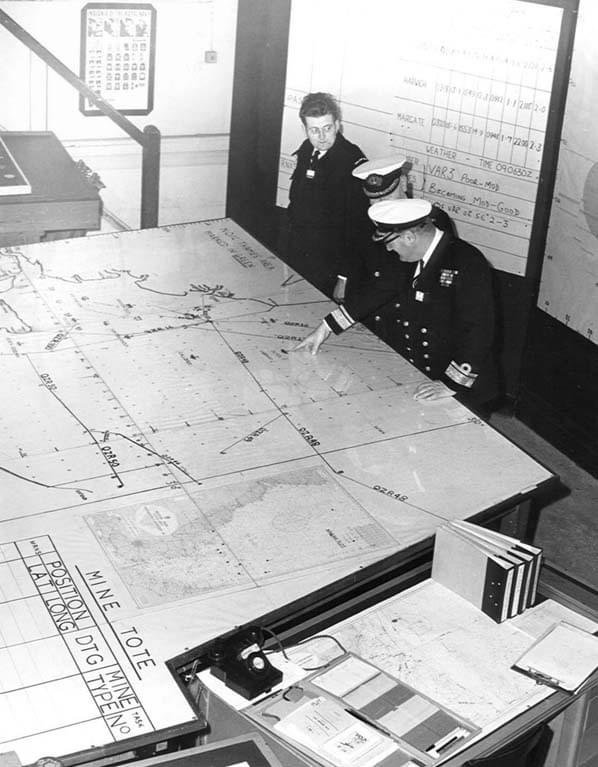 Rear Admiral Dunlop, Flag Officer Medway, inspects the Main Plot ()
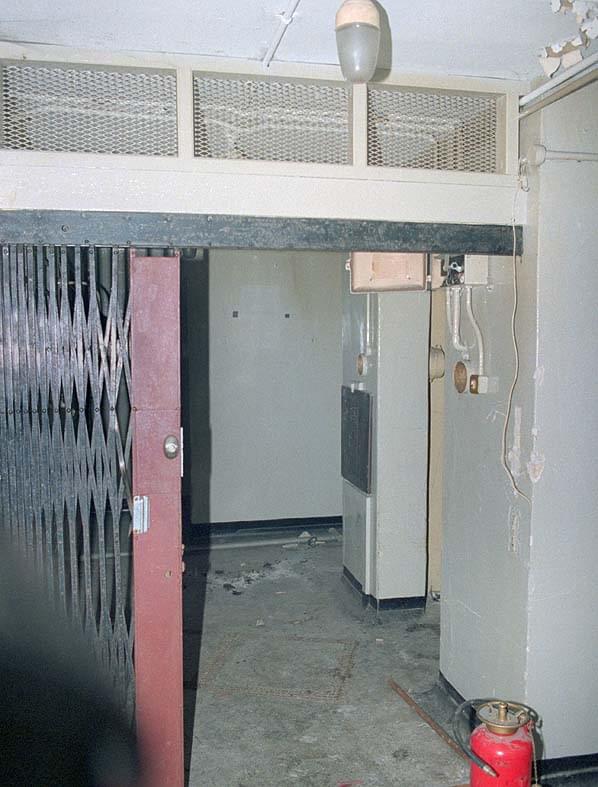 The main entrance to the tunnels in 1987, inside the now demolished surface building (Sub Brit collection)
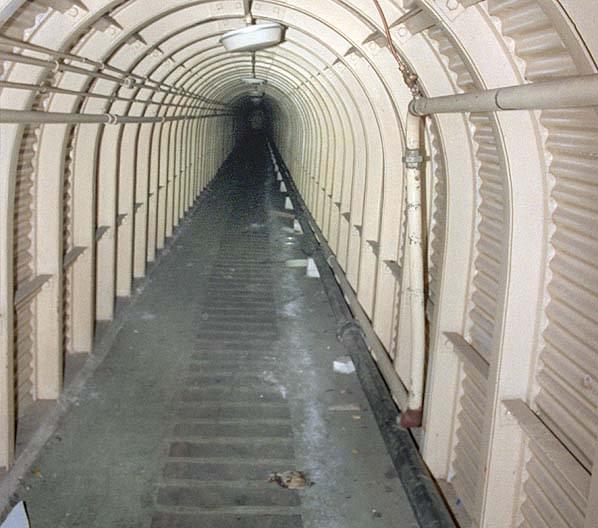 The steeply inclined main entrance trunel in 1987 (Sub Brit collection)
 The steeply inclined main entrance tunnel in 1987 (Sub Brit collection)
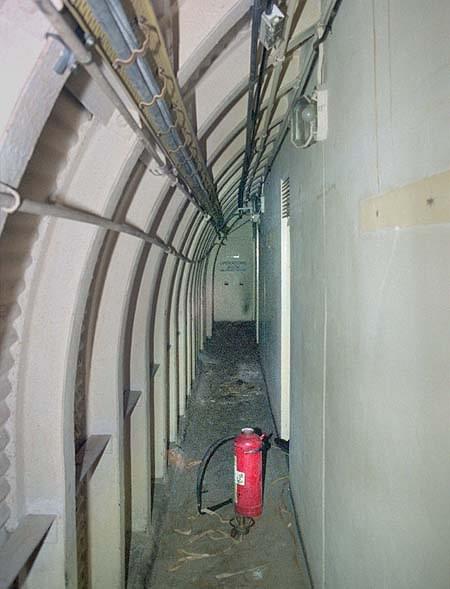 Southern cross tunnel near the main entrance in 1987. The arrow on the end wall points to the conference room (Sub Brit collection)
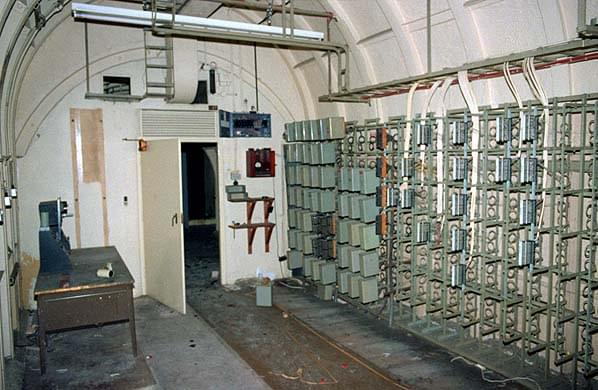 Main distribution frame in the GPO DTN Room (58) (Sub Brit collection)
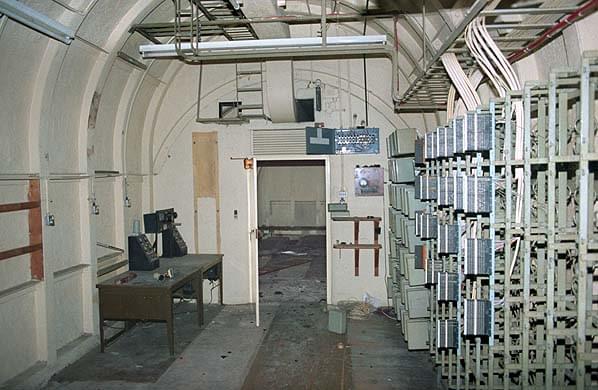 Main distribution frame in the GPO DTN Room (58). Beyond is the GPO Power Room (59) (Sub Brit collection)
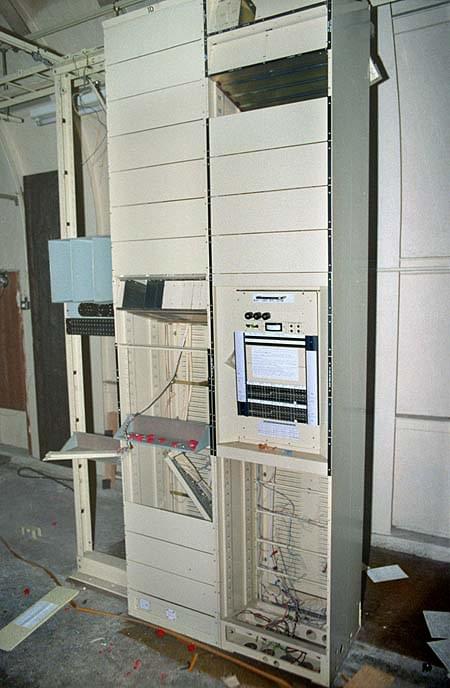 Rack of transmission equipment in the GPO DTN Room (58) (Sub Brit collection)
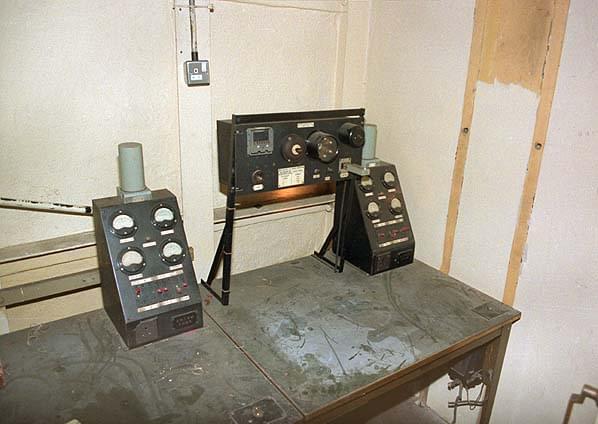 The GPO DTN Room (58) (Sub Brit collection)
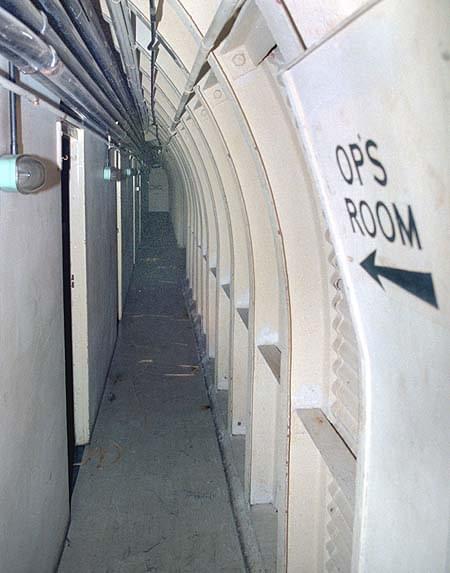 The Northern cross tunnel leading into the 'Ops Room' (1987) (Sub Brit collection)
 The 'Ops Room' looking east (1987). The plotting table is in the foreground. The tunnel at the top of the first landing leads to the main plant area and the emergency exit shaft (Sub Brit collection)
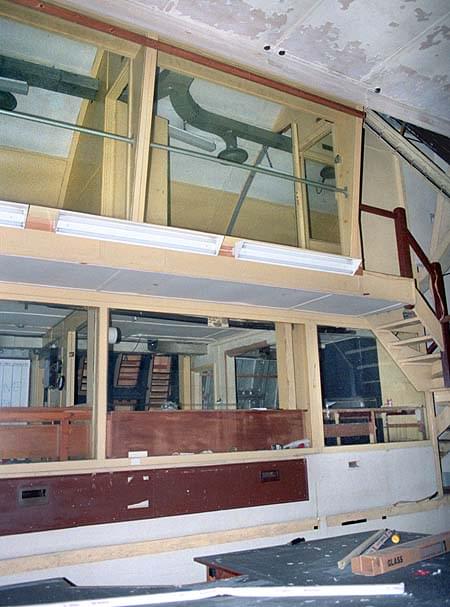 The 'Ops Room' (1987). The plotting table is in the foreground overlooked by two levels of cabins (Sub Brit collection)
 The 'Ops Room' (1987). The plotting table is in the foreground overlooked by the lower level cabins (Sub Brit collection)
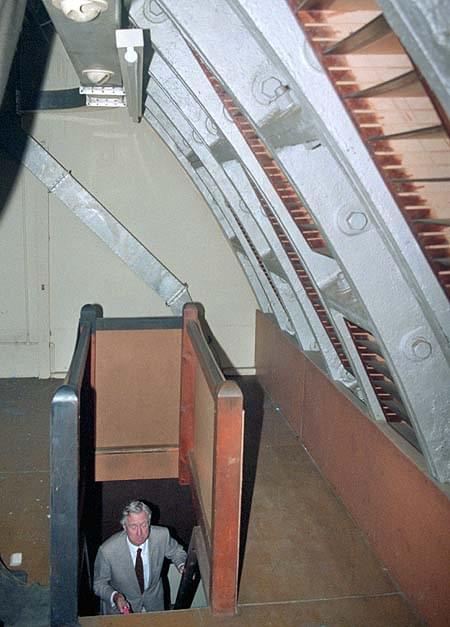 Stairs up to the mezzanine floor at the rear of the 'Ops Room' (1987) The curved structure of the 'Ops Room' is clearly visible (Sub Brit collection)
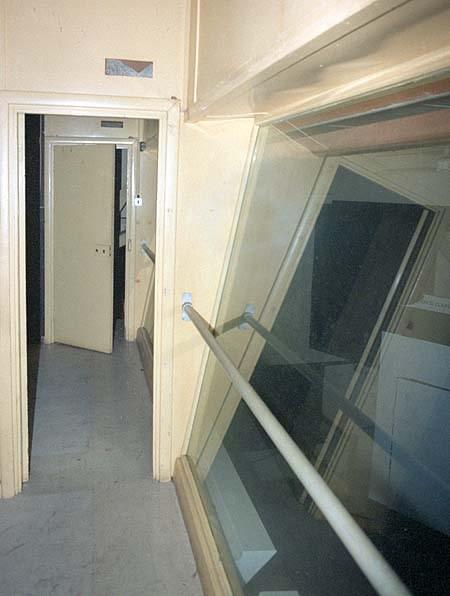 The upper level cabins in the 'Ops Room' looking west (1987) (Sub Brit collection)
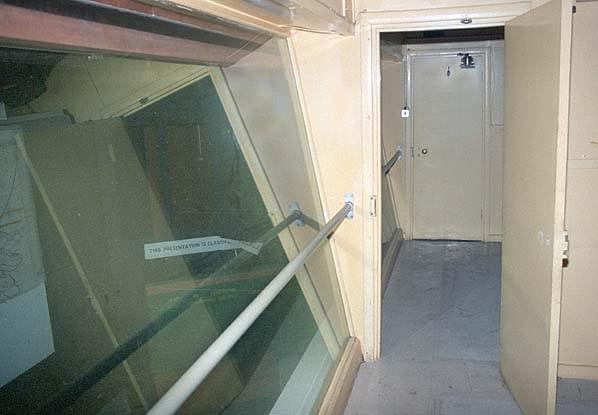 The upper level cabins in the 'Ops Room' looking east (1987) (Sub Brit collection)
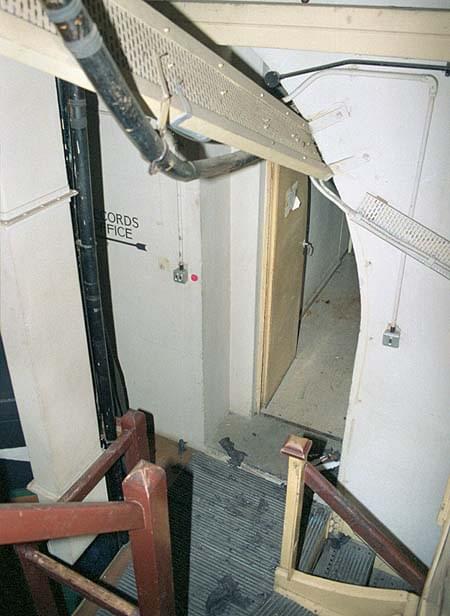 Looking down the steps from the upper level cabins in the 'Ops Room' looking east (1987) (Sub Brit collection)
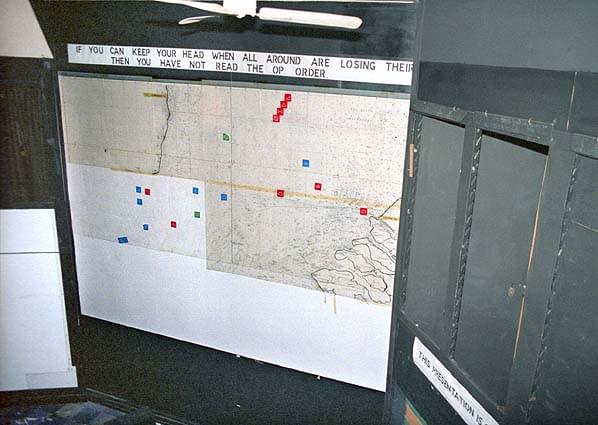 Map board in 'Ops Room' (1987) (Sub Brit collection)
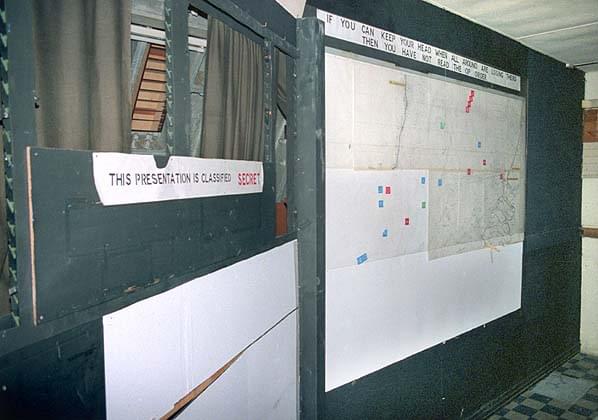 Map board in the 'Ops Room' (1987) (Sub Brit collection)
 Map board in the 'Ops Room' (1987) (Sub Brit collection)
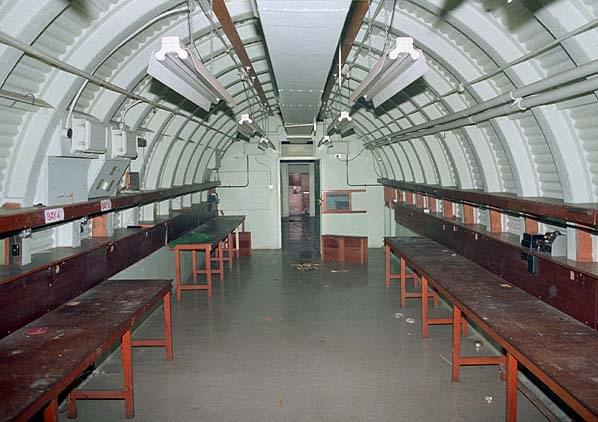 Teleprinter Room (46), the Main Signals Office is through the doorway (1987) (Sub Brit collection)
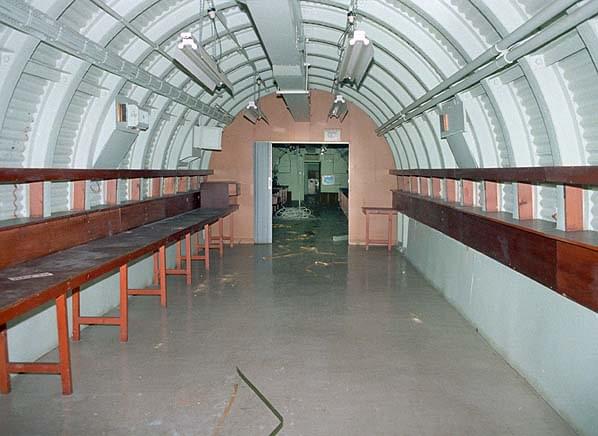 Teleprinter Room (45), the other teleprinter room is through the doorway (1987) (Sub Brit collection)
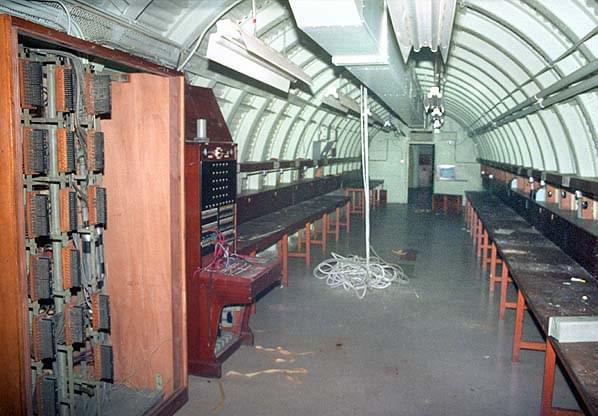 Teleprinter Room (46) and PMBX (1987) (Sub Brit collection)
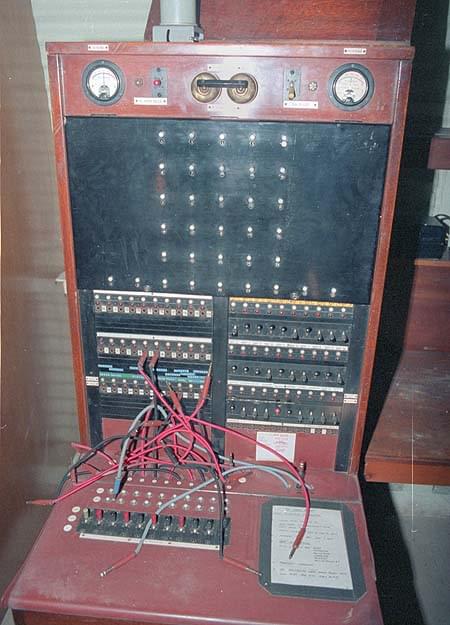 PMBX in the Teleprinter Room (46) (1987) (Sub Brit collection)
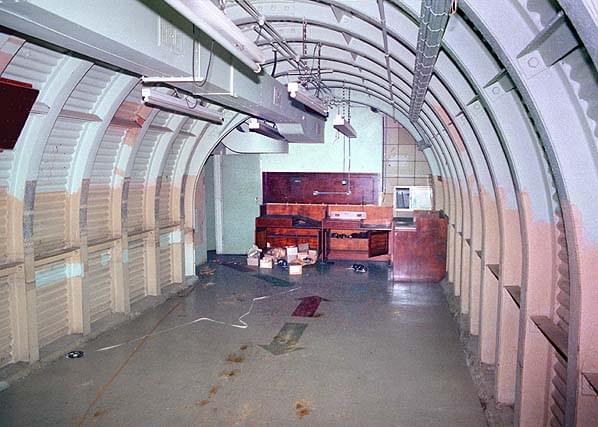 Classroom (19) (1987) (Sub Brit collection)
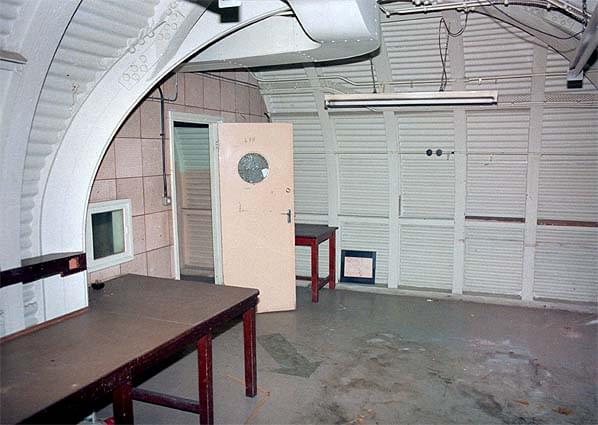 Classroom (20), a second classroom is through the door. (1987) (Sub Brit collection)
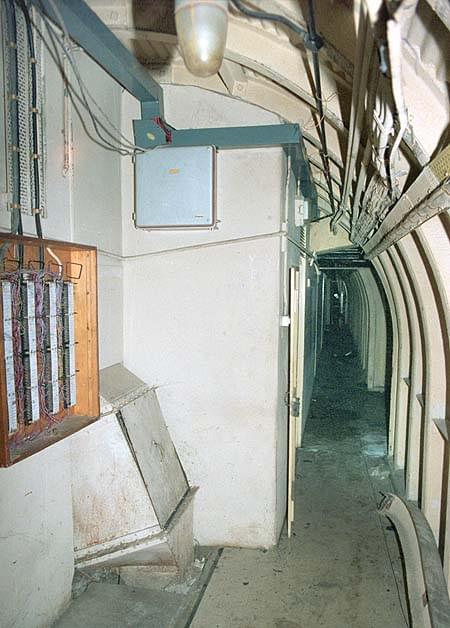 Northern cross tunnel looking towards the 'Ops Room' (1987) (Sub Brit collection)
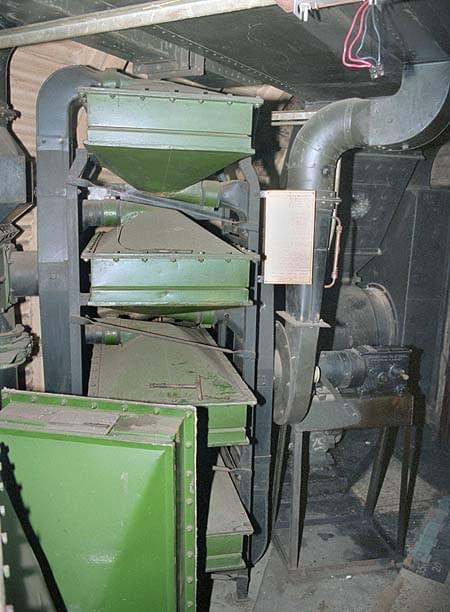 The main air conditioning plant room. The green units are carbon filters made by Sutcliffe and Sweetman (1987) (Sub Brit collection)
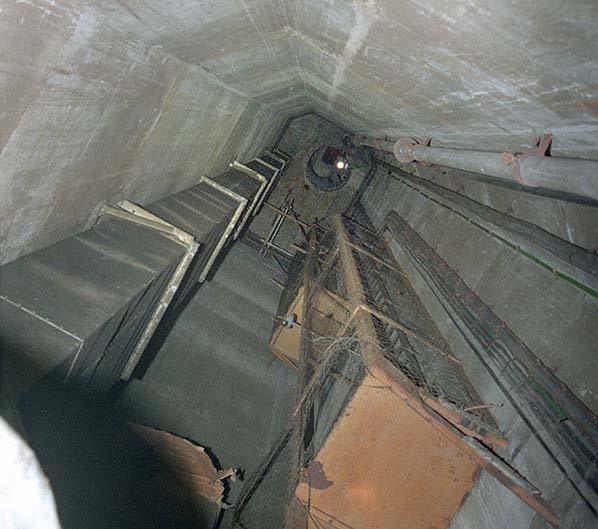 Looking up the emergency escape and ventilation shaft (1987) (Sub Brit collection)
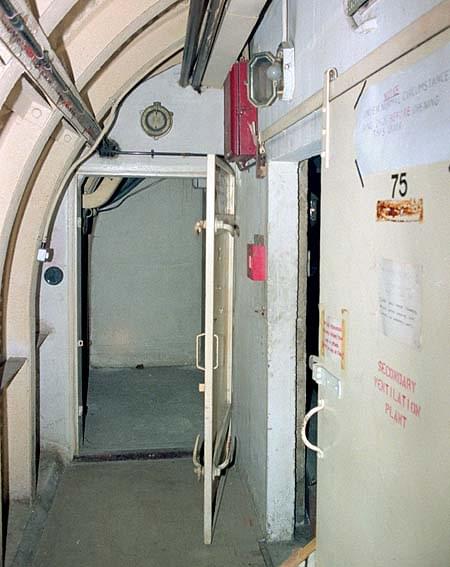 Air lock at the bottom of the incline up to entrance 2 (1987). The secondary ventilation plant room is to the right (Sub Brit collection)
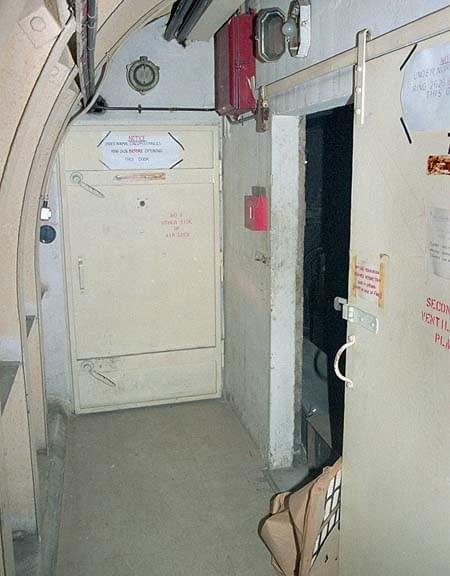 Air lock at the bottom of the incline up to entrance 2 (1987). The secondary ventilation plant room is to the right (Sub Brit collection)
 Inclined tunnel up to entrance 2 (1987) (Sub Brit collection)
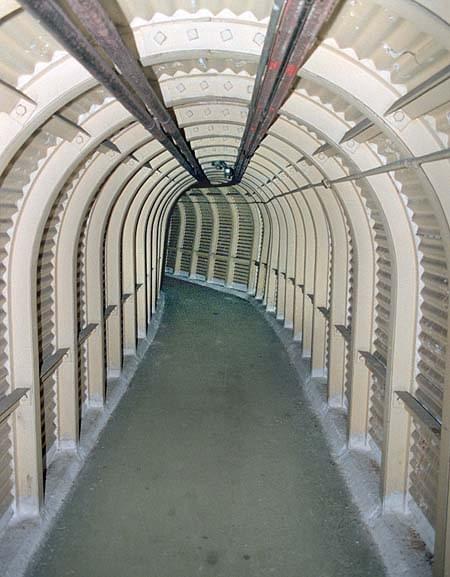 Inclined tunnel up to entrance 2 (1987) (Sub Brit collection)
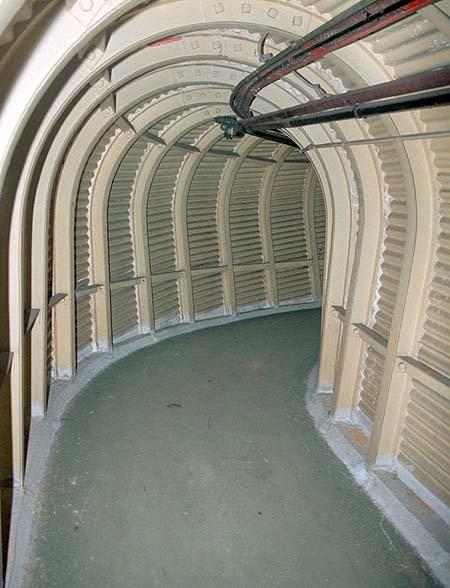 Inclined tunnel up to entrance 2 (1987) (Sub Brit collection)
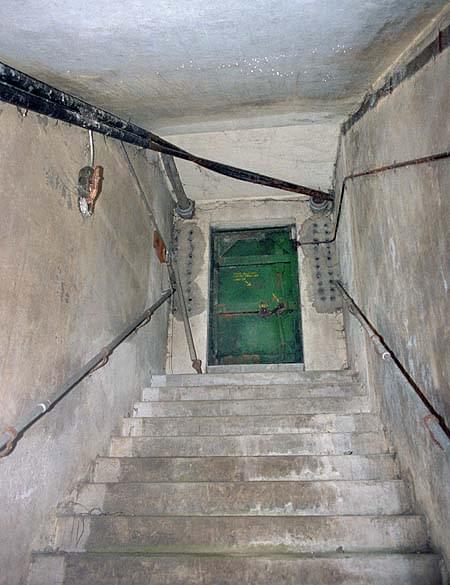 Entrance 2 (1987) (Sub Brit collection)
 Entering through the emergency exit door (Dom Jackson)
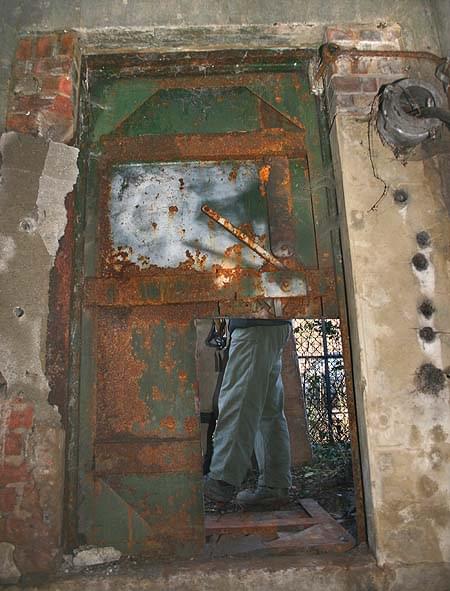 The emergency exit door (Dom Jackson)
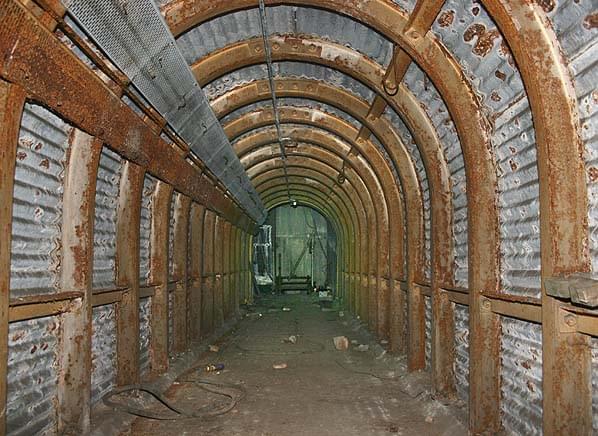 High level tunnel from the emergency exit into the moat to the top of the escape shaft (Dom Jackson)
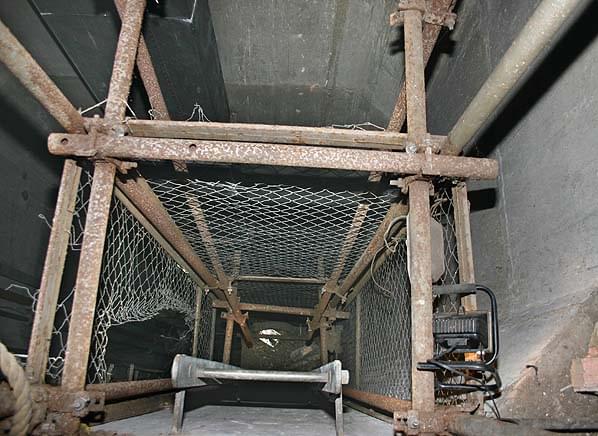 Top of the emergency escape shaft (Dom Jackson)
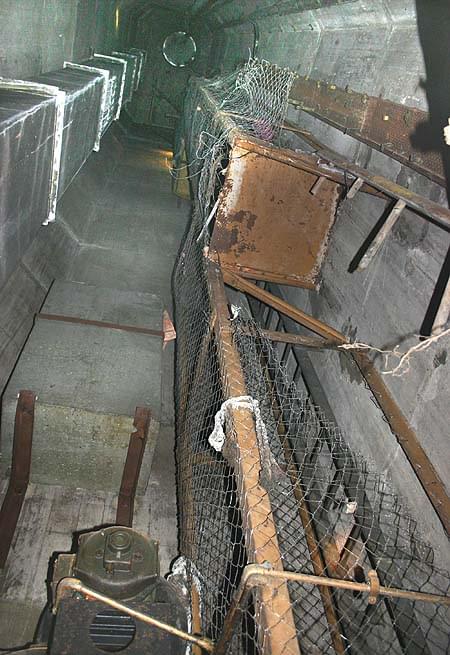 Emergency escape shaft (Dom Jackson)
 Looking up the emergency escape shaft (Kent Underground Exploration Team)
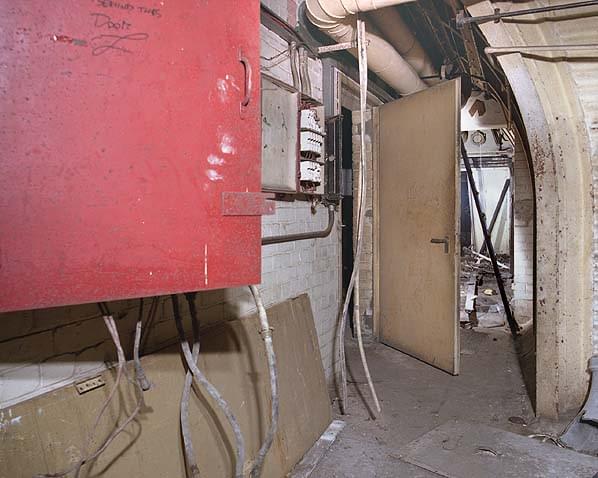 Looking along tunnel into the generator room. The door on the left is into the main ventilation plant room (Nick Catford)
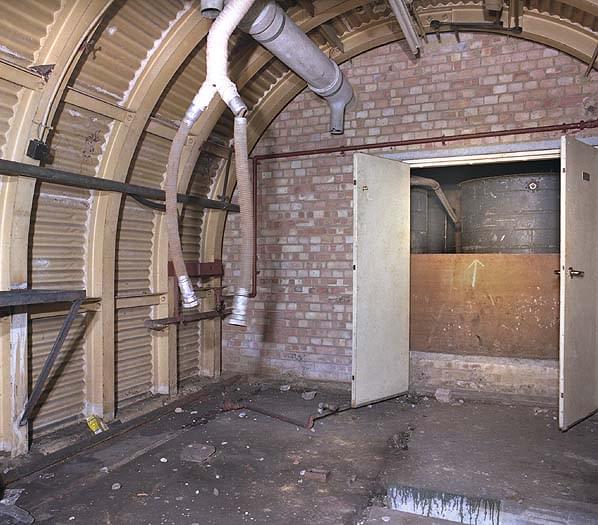 Generator Room, the fuel tanks are through the doors (Nick Catford)
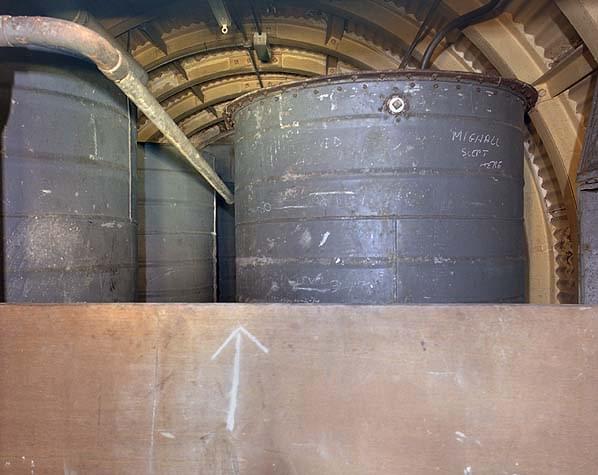 Fuel tanks for the generator (Nick Catford)
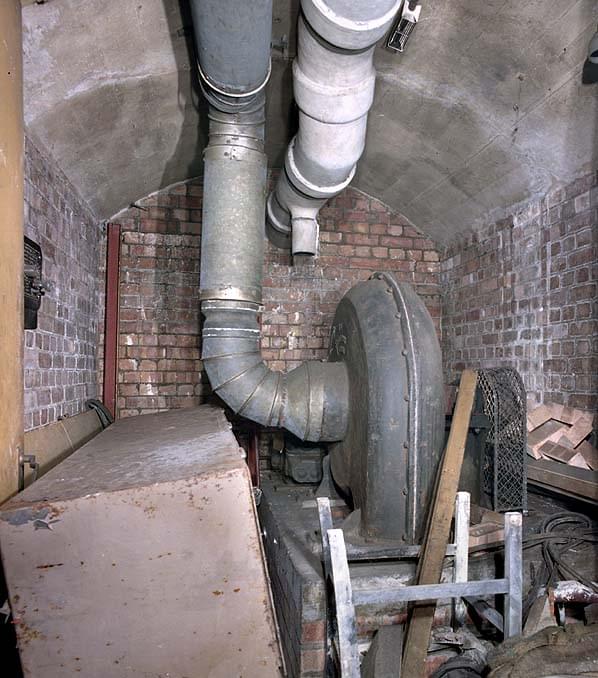 Lamson pump room (Nick Catford)
 Main ventilation plant room door (Kent Underground Exploration Team)
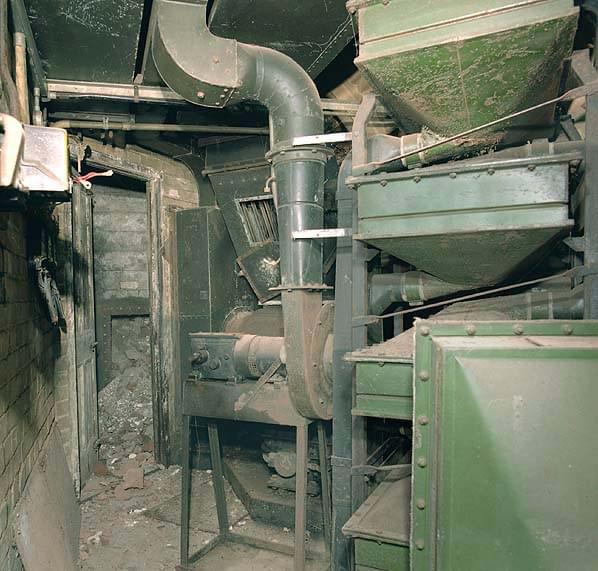 Main ventilation plant room (Nick Catford)
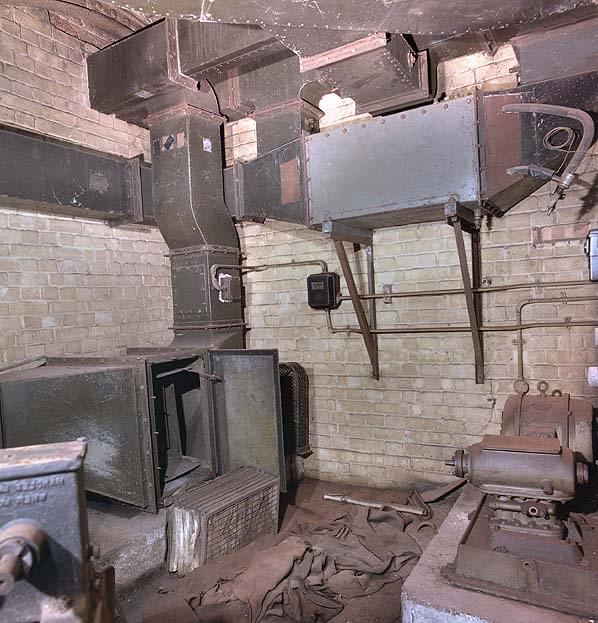 Main ventilation plant room (Nick Catford)
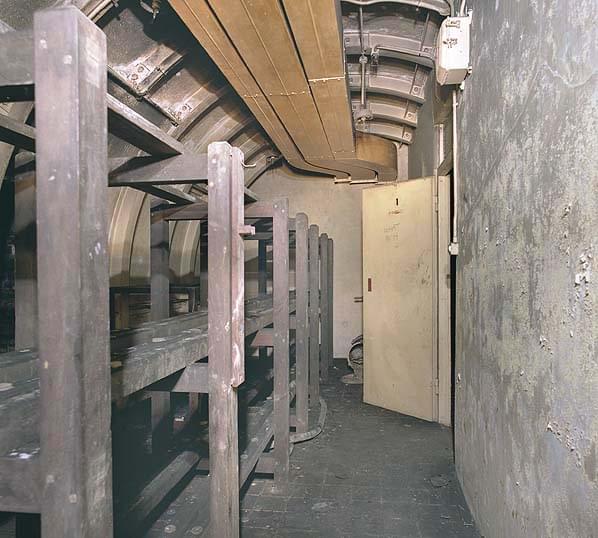 Battery room (Nick Catford)
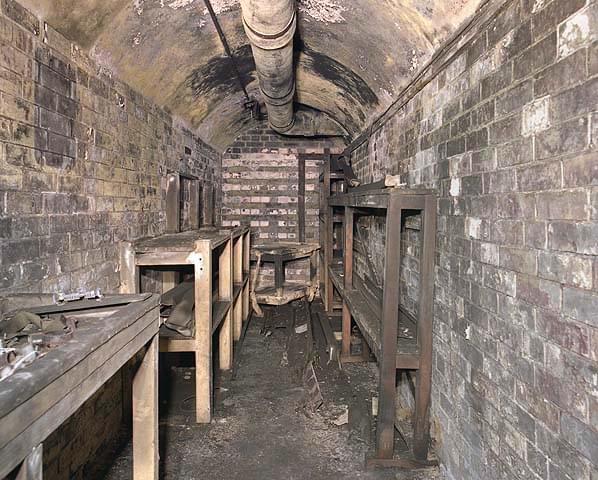 Battery room annexe (Nick Catford)
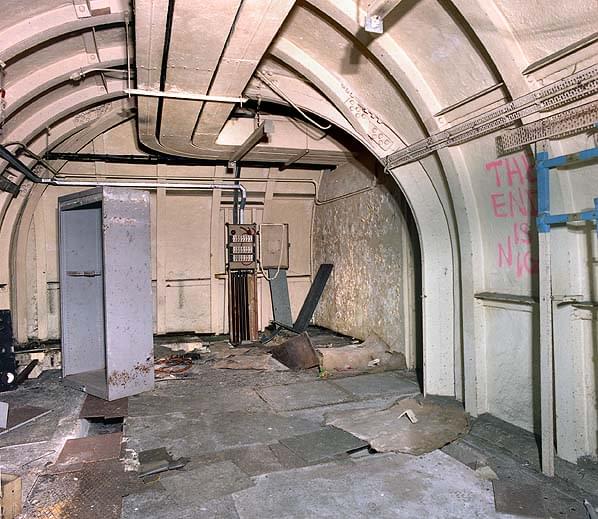 GPO Power Room (Nick Catford)
 GPO Power Room (Kent Underground Exploration Team)
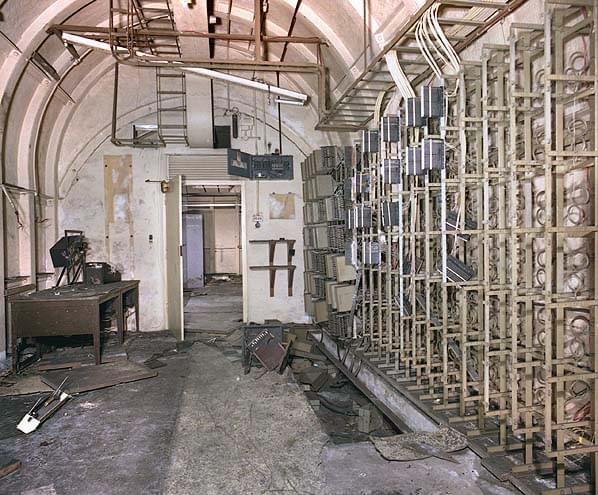 Main Distribution Frame (MDF) in the GPO/BT DTN Room (Nick Catford)
 Main Distribution Frame (MDF) in the GPO/BT DTN Room (Nick Catford)
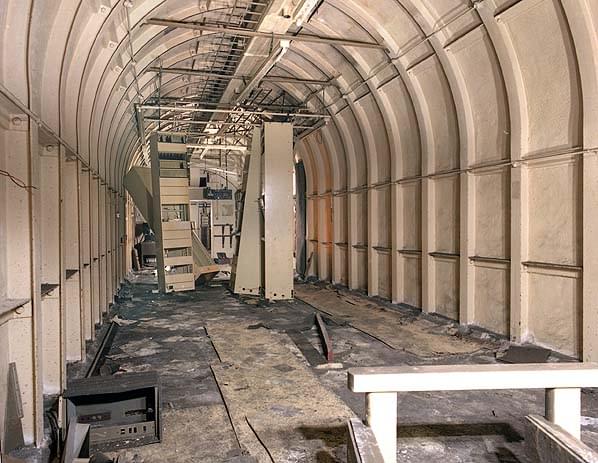 GPO/BT DTN Room, the racks in the middle contain transmission equipment (Nick Catford)
 GPO/BT Room (57) (Nick Catford)
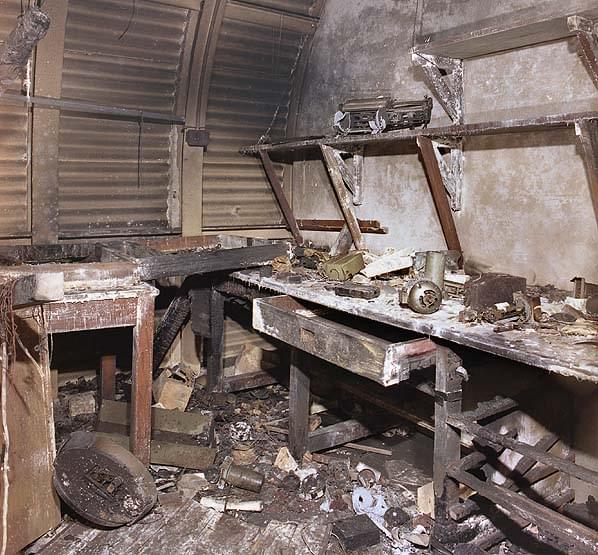 GPO/BT Room (56) (Nick Catford)
 Lamson tubes and terminal, use of room unknown post war but in WW2 it was a Cypher Room, hence the need for Lamson tubes (Nick Catford)
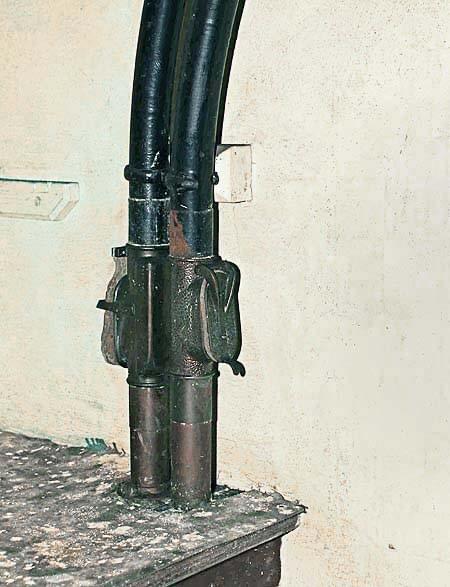 Lamson tubes and terminal, use of room unknown post war but in WW2 it was a Cypher Room, hence the need for Lamson tubes (Bob Jenner)
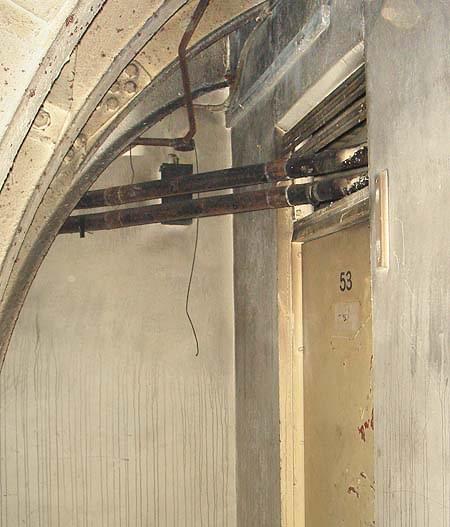 Lamson tubes going into the Wardroom. When the Lamson tubes were installed in WW2 this was the Cypher Office, hence the need for the tubes which went through room 53 to the Lamson terminal in Room 54, the second Cypher Office (Bob Jenner)
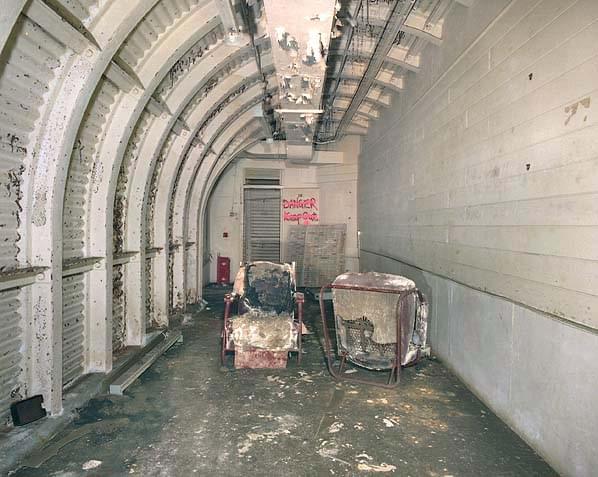 Classroom (Nick Catford)
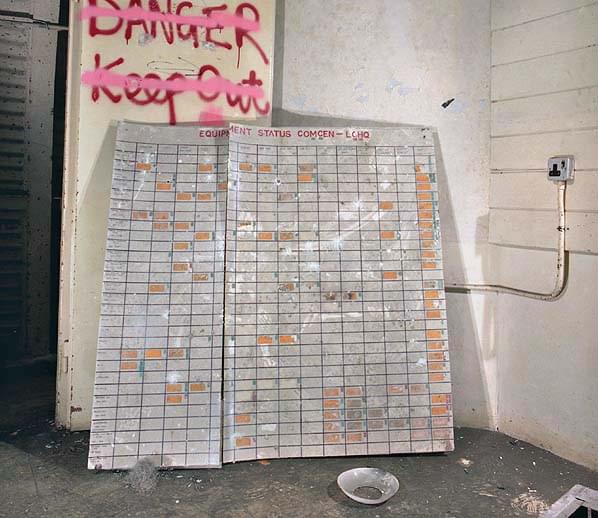 LCHQ Equipment status board Classroom (29) (Nick Catford)
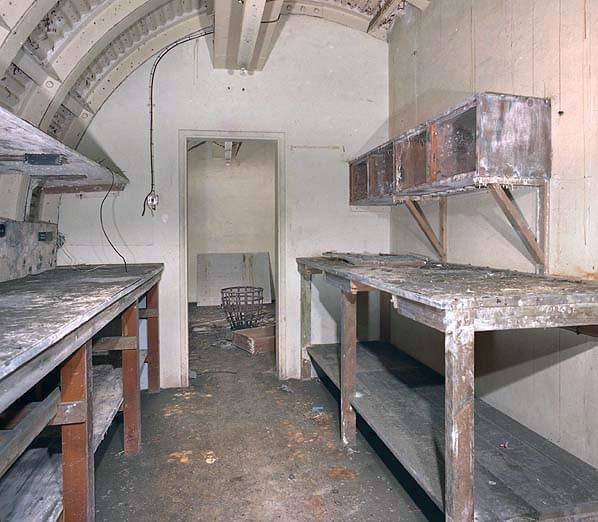 Storeroom (25) (Nick Catford)
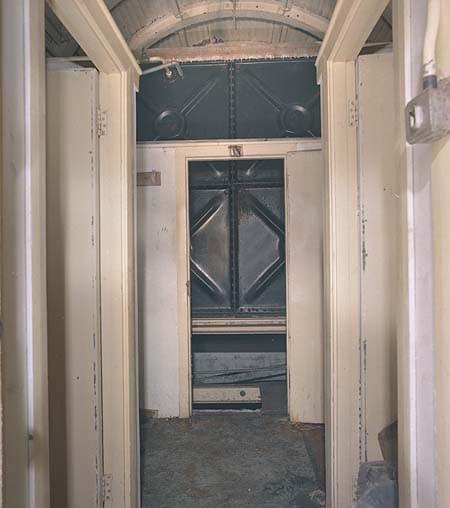 Water tank (toilets left and right) (Nick Catford)
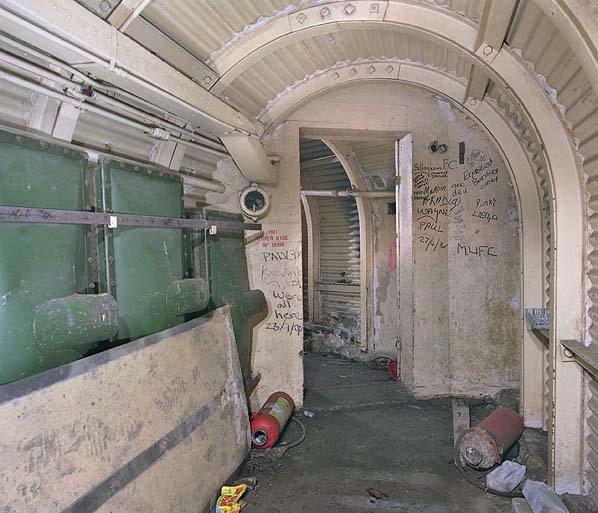 Looking through the air lock towards the inclined tunnel up to the main entrance (Nick Catford)
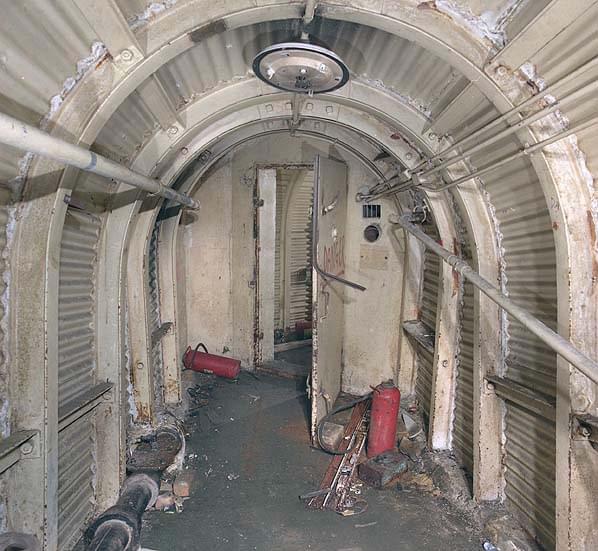 Air lock at the end of the inclined tunnel from the main entrance (Nick Catford)
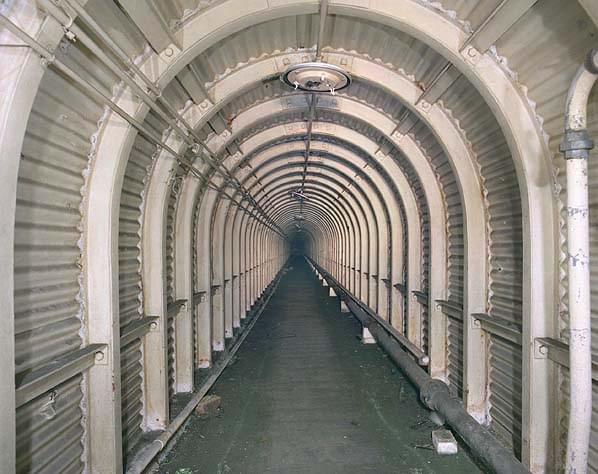 Inclined tunnel up to the main entrance (Nick Catford)
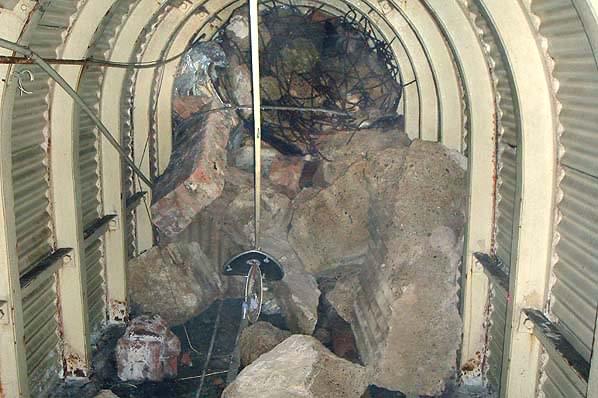 Top of the iclined tunnel up to the main entrance. The rubbkle is from the demolished entrance building (Bob Jenner)
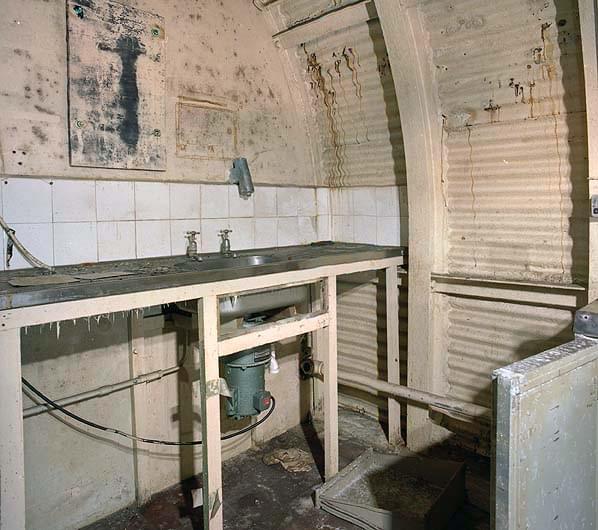 Galley (Nick Catford)
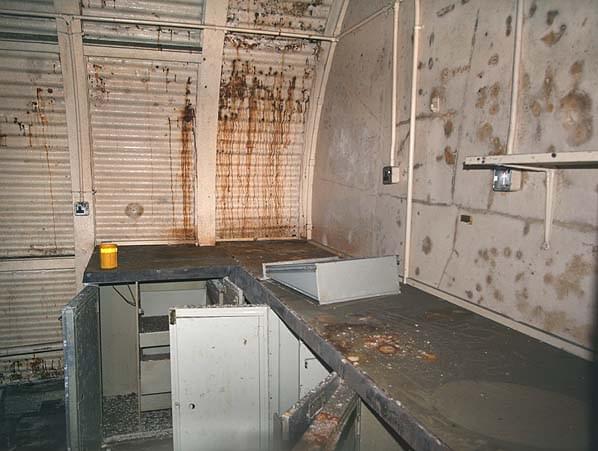 Sick bay (Nick Catford)
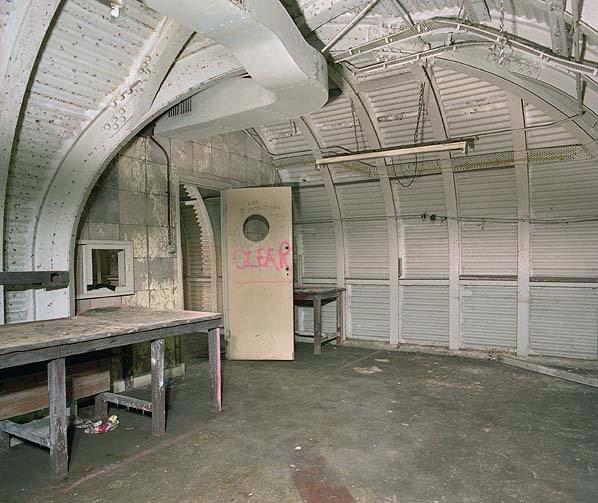 Classroom (Nick Catford)
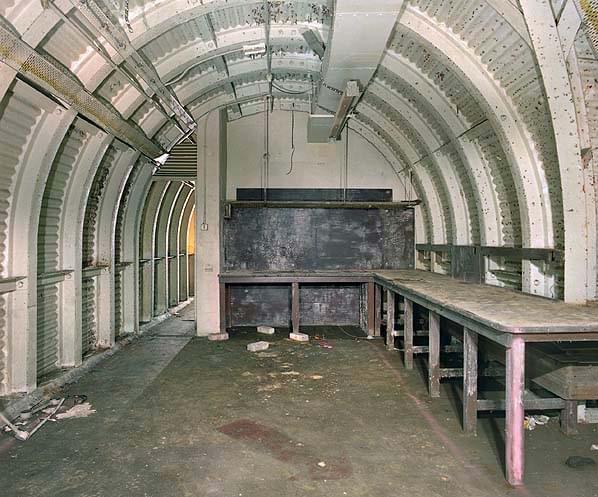 Classroom (Nick Catford)
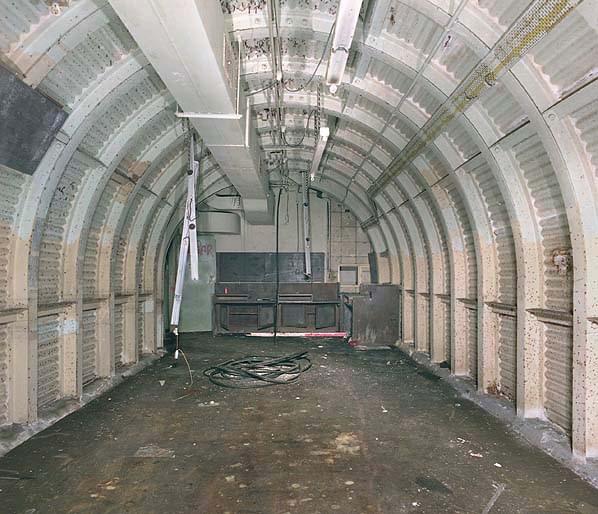 Classroom (Nick Catford)
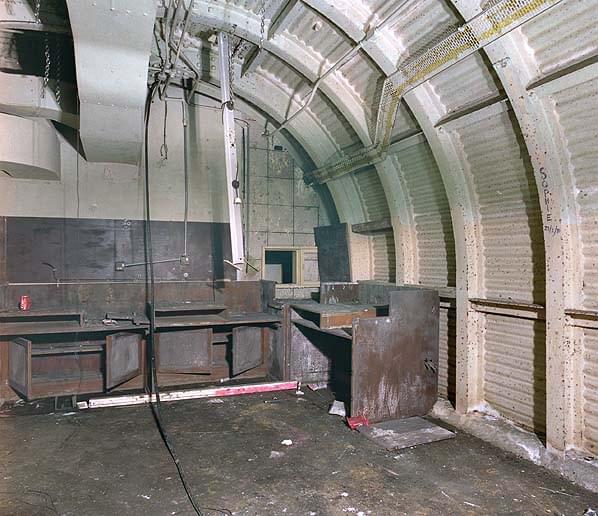 Classroom (Nick Catford)
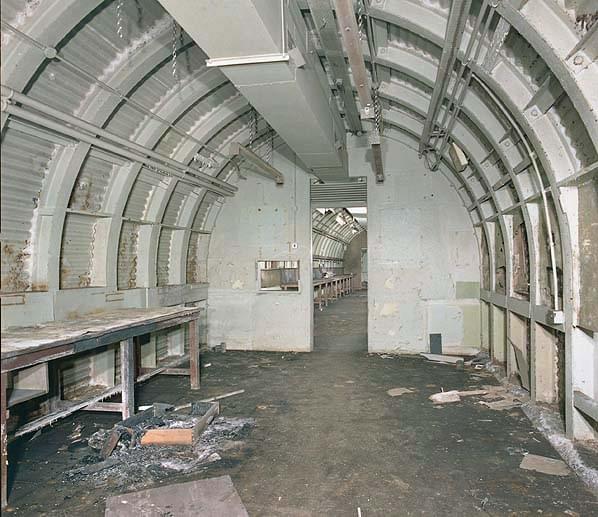 Main Signals Office (47) looking into the teleprinter room (Nick Catford)
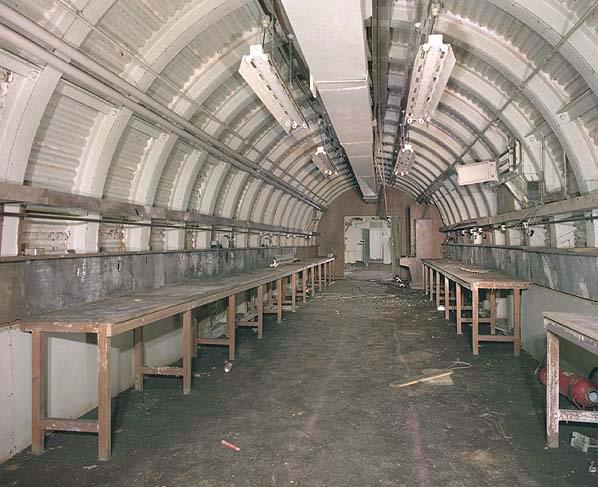 Teleprinter room (46) looking into the second teleprinter room (Nick Catford)
 Equipment in teleprinter room (Nick Catford)
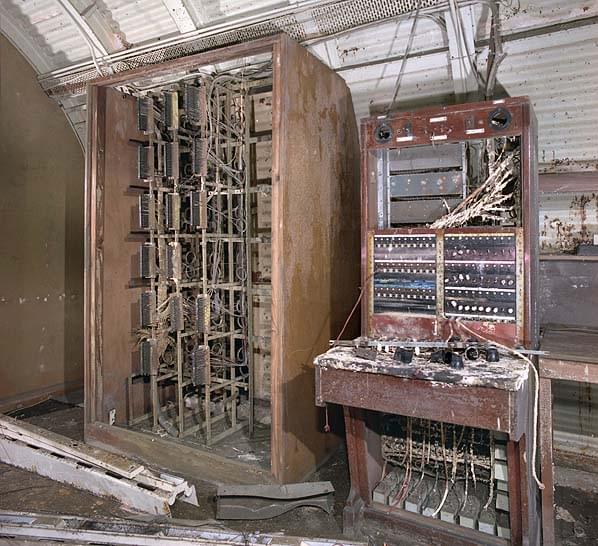 PMBX in the Teleprinter room (46) (Nick Catford)
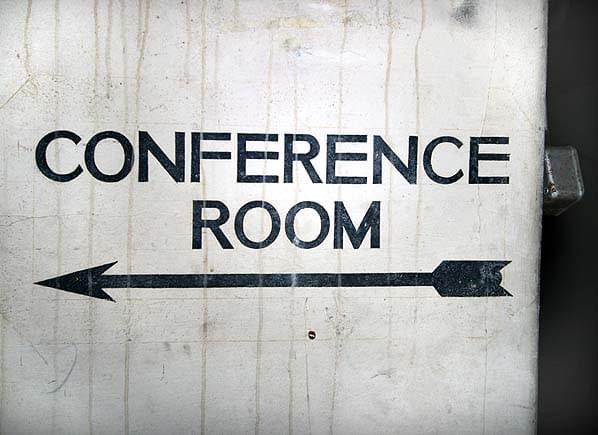 To the Conference Room (Nick Catford)
 The Conference Room (Nick Catford)
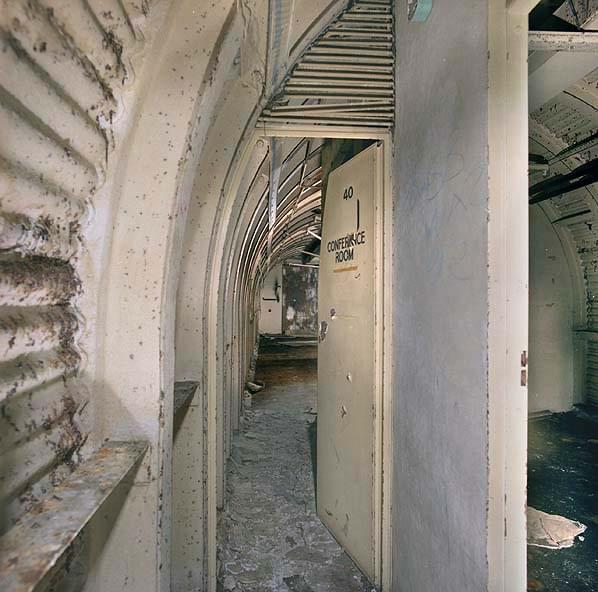 The Conference Room (Nick Catford)
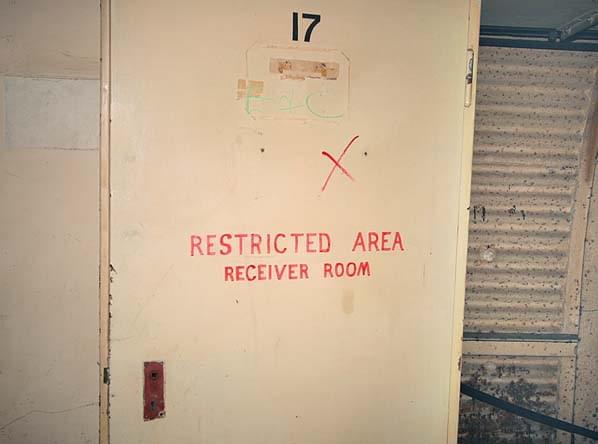 Receiver Room (Nick Catford)
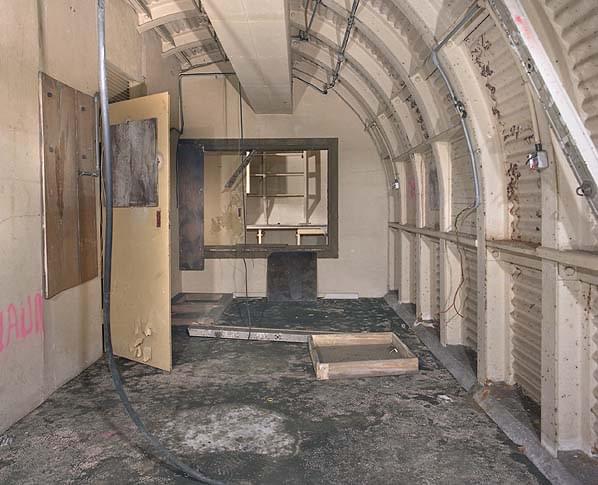 Receiver Room (Nick Catford)
 Unknown Room (14) (Nick Catford)
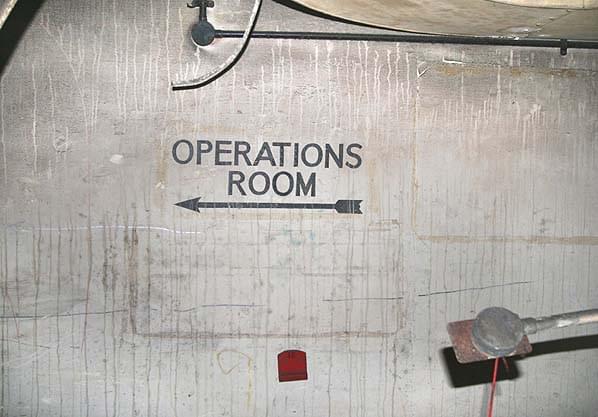 To the Operations Room (Nick Catford)
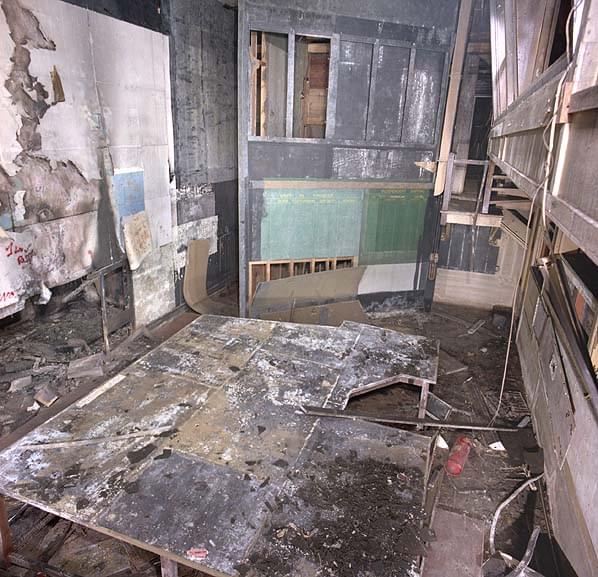 The Operations Room with the plotting table in the foreground (Nick Catford)
 The Operations Room with the plotting table in the foreground (Nick Catford)
 Steps up to the mezzanine floor at the rear of the Operations Room (Nick Catford)
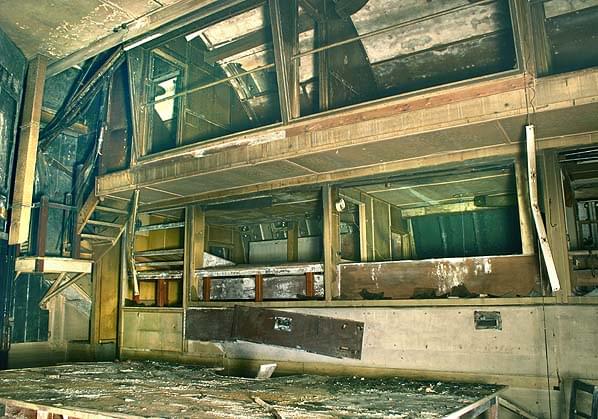 Cabins overlooking the plotting table in the Operations Room (Dom Jackson)
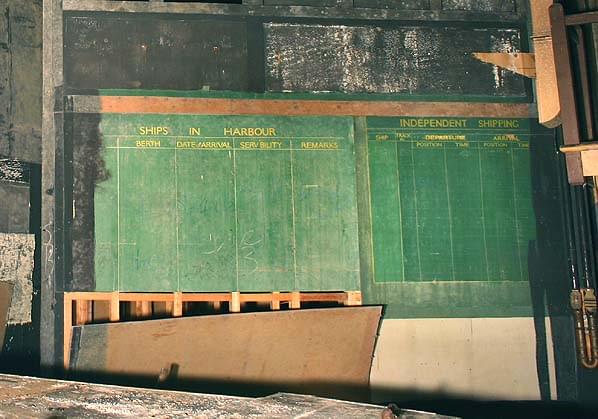 Situation board in the Operations Room. Note the Lamson terminal on the far right (Dom Jackson)
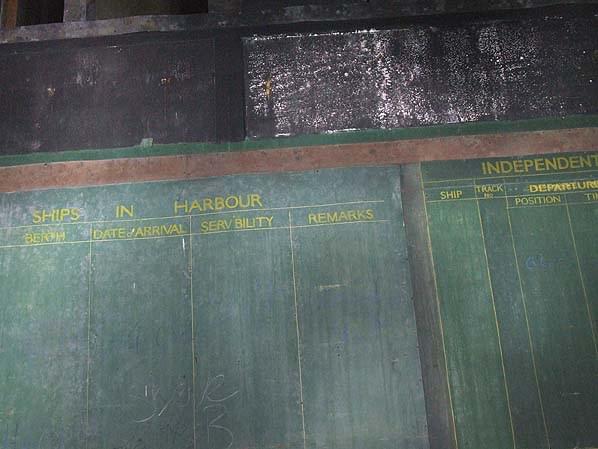 Situation board in the Operations Room (Kent Underground Exploration Team)
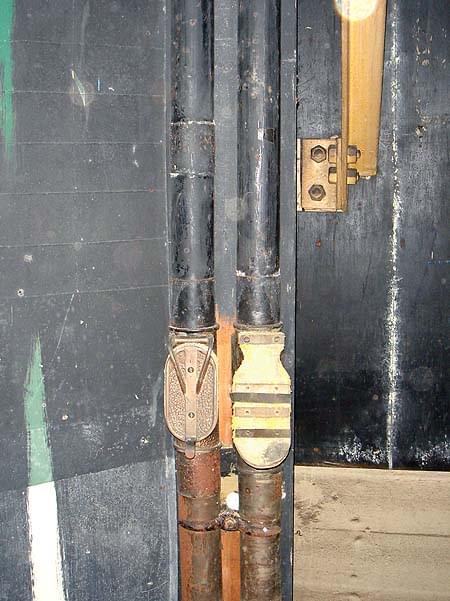 Lamson terminal in the Operations Room (Bob Jenner)
 Lower cabins (Nick Catford)
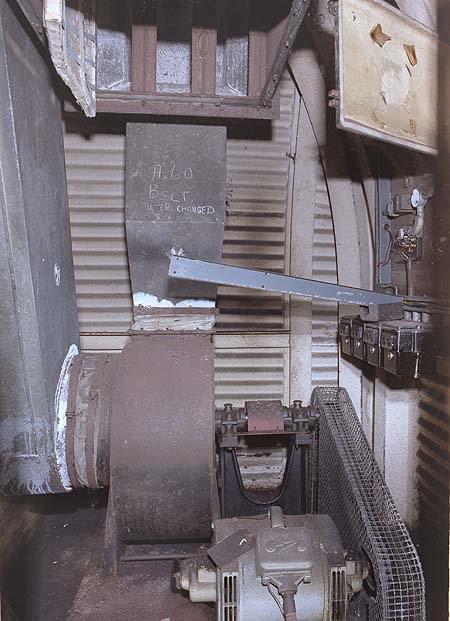 Ventilation fan (Nick Catford)
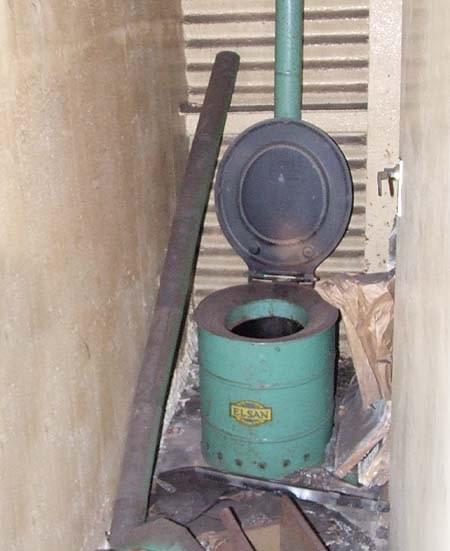 When the tunnels were altered in the 1960's new flushing toilets were installed near the main entrance but four original WW2 chemical toilets were also retained (Kent Underground Exploration Team)
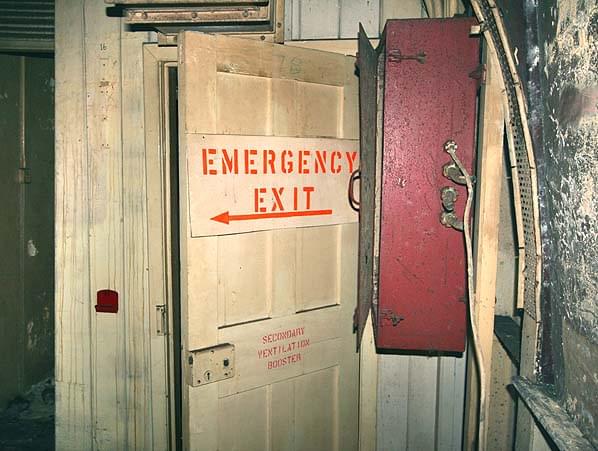 Secondary ventilation fan and route to Entrance 2 (Nick Catford)
 Carbon filters made by Sutcliffe & Speakman in the secondary ventilation plant room (Nick Catford)
 The secondary ventilation plant room. The second ventilation shaft is through the door at the back of the room (Nick Catford)
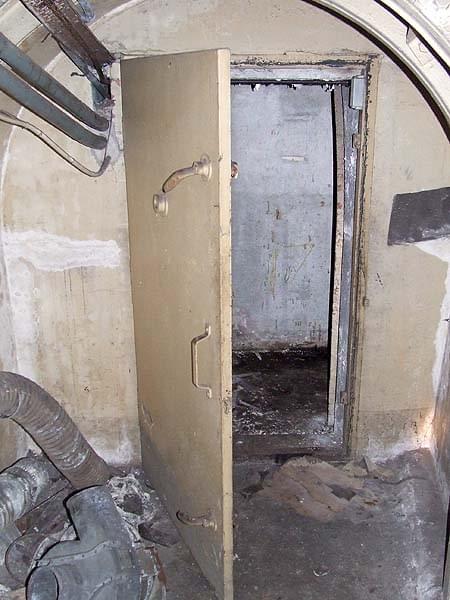 Air lock at the bottom of the incline down from Entrance 2 (Kent Underground Exploration Team)
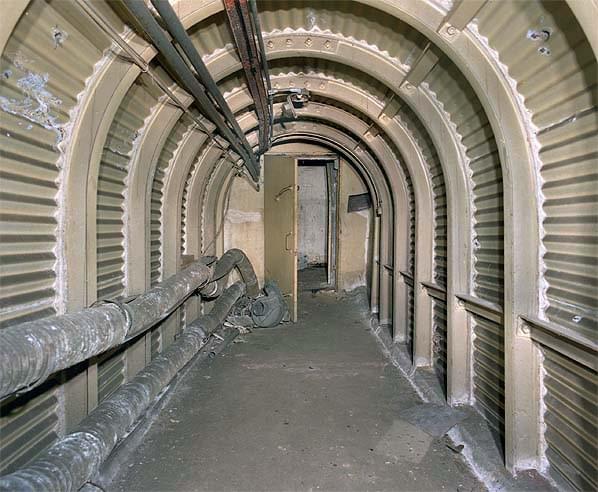 Air lock at the bottom of the incline down from Entrance 2 (Nick Catford)
 Incline up to Entrance 2 (Dom Jackson)
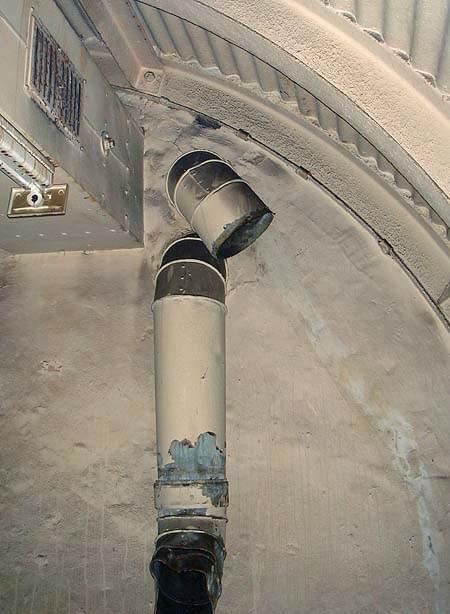 Lamson Room - That is the air supply and exhaust for the Lamson system, runs through to the Lamson pump room (Bob Jenner)
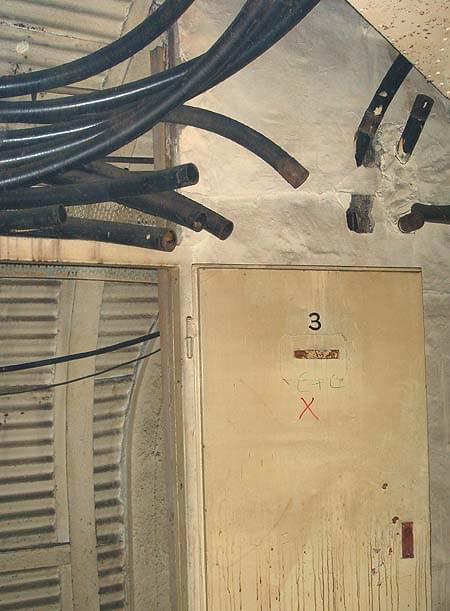 Lamson Room (Bob Jenner)
 Lamson Room (Bob Jenner)
 Sign (Dom Jackson)
 Sign (Kent Underground Exploration Team)
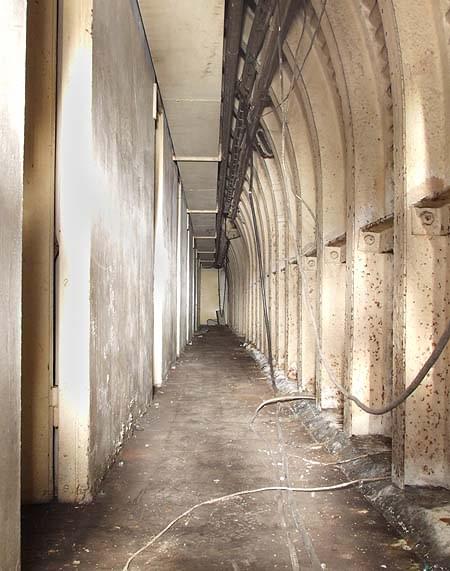 Corridor (Kent Underground Exploration Team)
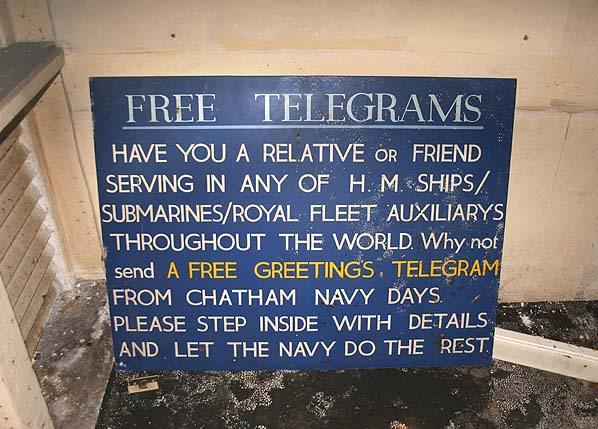 Sign from Chatham Navy Day. HMS Wildfire would have been responsible for sending the telegrams (Dom Jackson)
 Unknown location (Nick Catford)
 Part of Chatham's Lower Lines defences. The Lower Lines were an extension of the Great Lines, a dry moat built to defend the Chatham Dockyard. The secondary entrance to the tunnels and the emergency exit are located in the outer wall of the Lower Lines. This view shows the current northern end of the Lower Lines where the dry moat joins Johnson Avenue (Nick Catford)
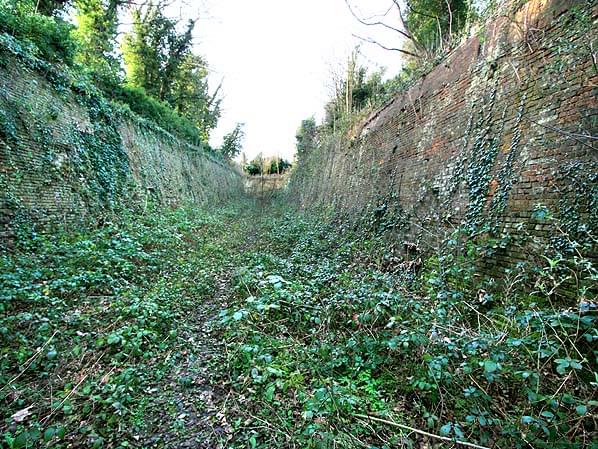 Part of Chatham's Lower Lines defences. The Lower Lines were an extension of the Great Lines, a dry moat built to defend the Chatham Dockyard. The secondary entrance to the tunnels and the emergency exit are located in the outer wall of the Lower Lines (Nick Catford)
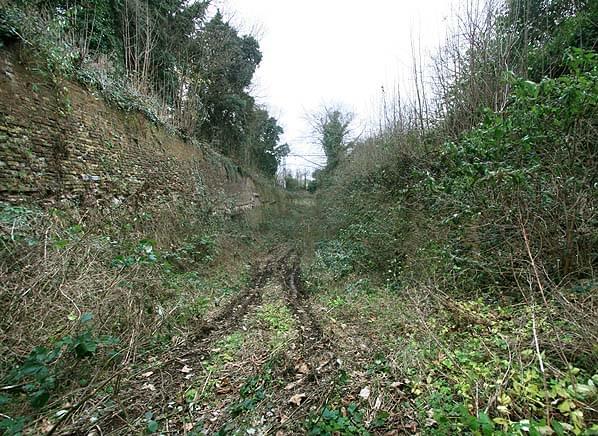 Part of Chatham's Lower Lines defences. The Lower Lines were an extension of the Great Lines, a dry moat built to defend the Chatham Dockyard. The secondary entrance to the tunnels and the emergency exit are located in the outer wall of the Lower Lines (Nick Catford)
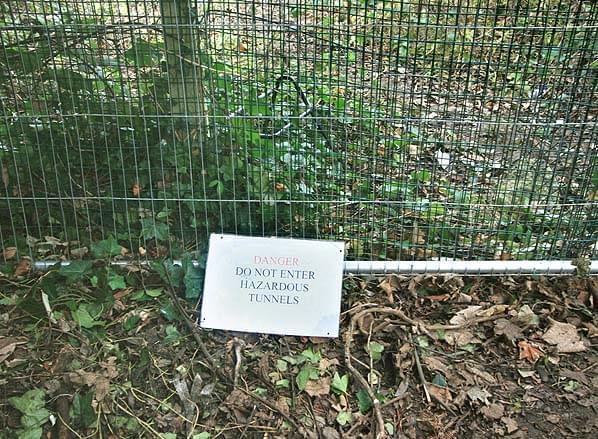 Warning sign by entrance 2 (Nick Catford)
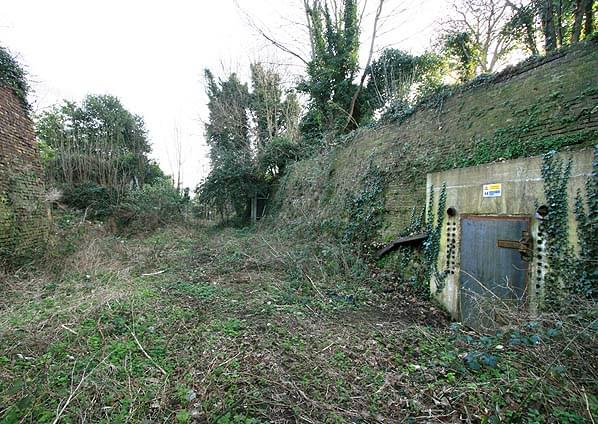 Part of Chatham's Lower Lines defences. The Lower Lines were an extension of the Great Lines, a dry moat built to defend the Chatham Dockyard. The secondary entrance to the tunnels and the emergency exit are located in the outer wall of the Lower Lines. Looking west from entrance 2. on the left the lines turn to the left behind the wall. Admiralty house was straight ahead and up a set of stone steps to the right beyond the fence on the higher level (Nick Catford)
 Part of Chatham's Lower Lines defences. The Lower Lines were an extension of the Great Lines, a dry moat built to defend the Chatham Dockyard. The secondary entrance to the tunnels and the emergency exit are located in the outer wall of the Lower Lines. Entrance 2 (Nick Catford)
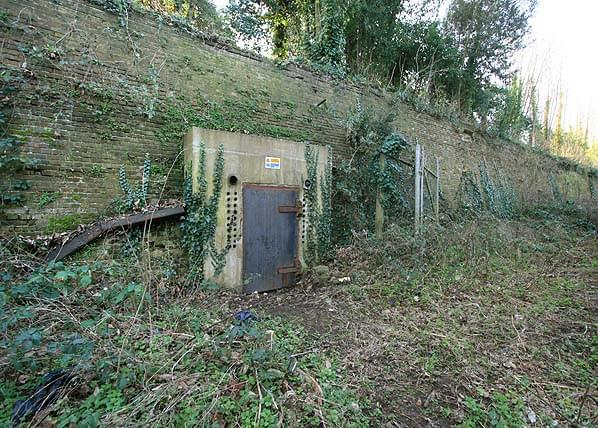 Part of Chatham's Lower Lines defences. The Lower Lines were an extension of the Great Lines, a dry moat built to defend the Chatham Dockyard. The secondary entrance to the tunnels and the emergency exit are located in the outer wall of the Lower Lines. Entrance 2 (Nick Catford)
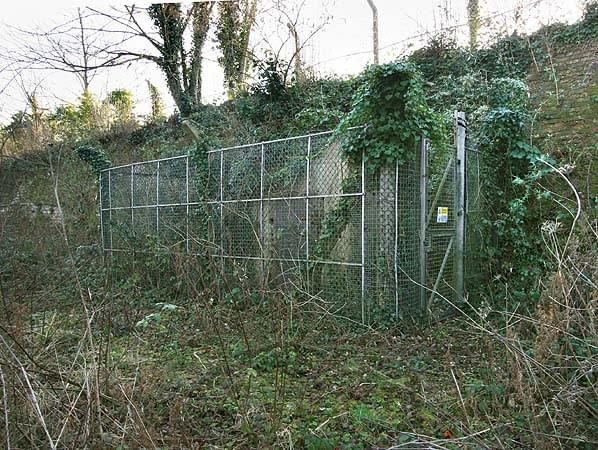 Part of Chatham's Lower Lines defences. The Lower Lines were an extension of the Great Lines, a dry moat built to defend the Chatham Dockyard. The secondary entrance to the tunnels and the emergency exit are located in the outer wall of the Lower Lines. Emergency exit (Nick Catford)
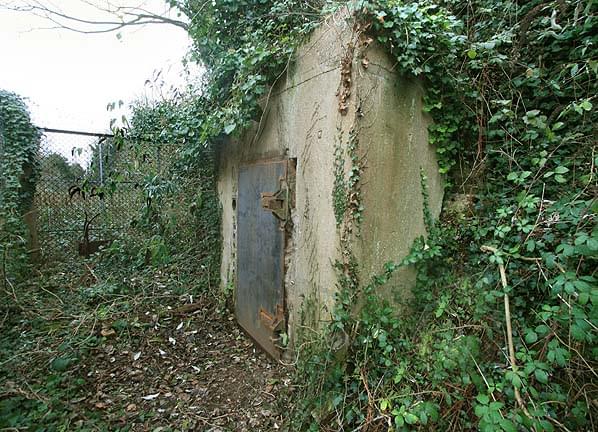 Part of Chatham's Lower Lines defences. The Lower Lines were an extension of the Great Lines, a dry moat built to defend the Chatham Dockyard. The secondary entrance to the tunnels and the emergency exit are located in the outer wall of the Lower Lines. Emergency exit (Nick Catford)
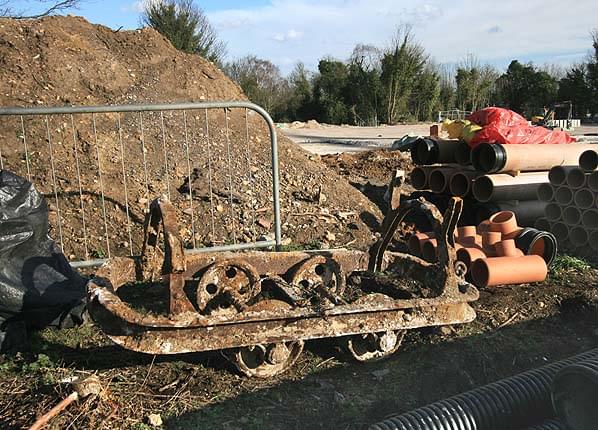 During building work above the tunnels early in 2008 this narrow gauge railway tipper wagon was found near one of the ventilation shafts indicating the probable use of a contractors railway to dispose of material from the tunnels (Nick Catford)
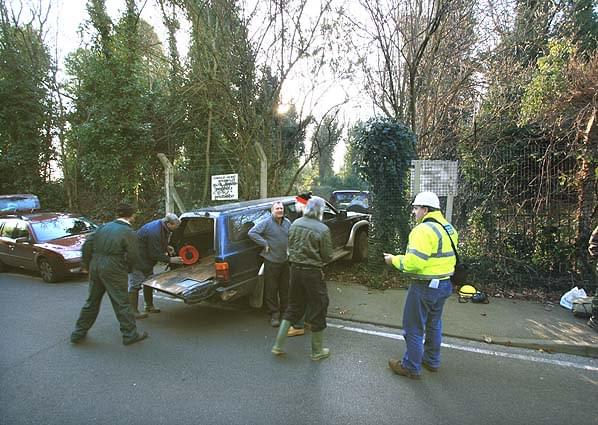 We had permission to cut the fence down (repaired later that day) and drive along the lines to the emergency exit (Nick Catford)
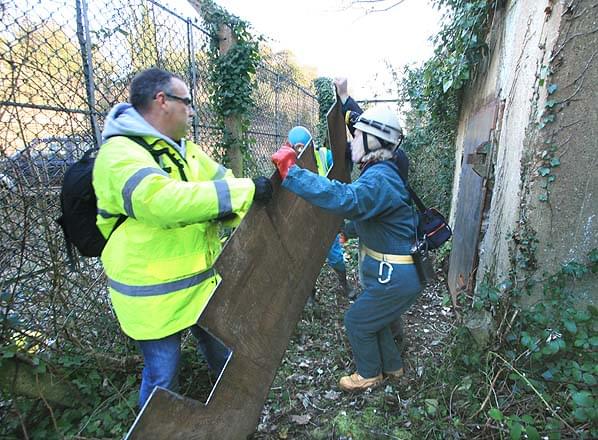 Bringing the new door panel onto the site (Nick Catford)
 Checking the new door panel fits (Nick Catford)
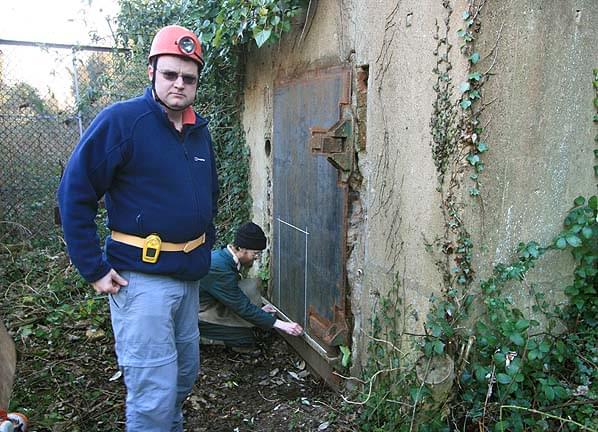 Measuring up before cutting (Nick Catford)
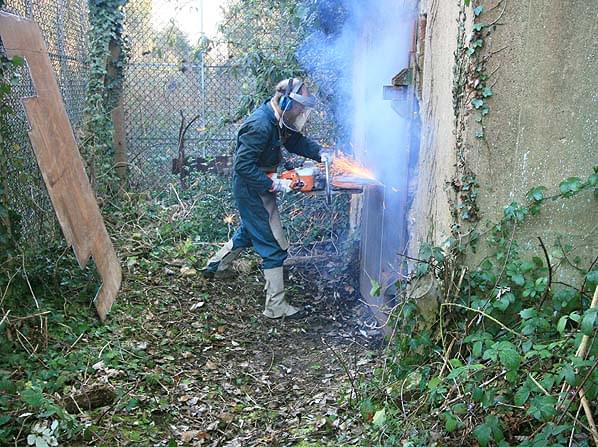 Cutting a panel out of the door to gain access to the tunnels (Nick Catford)
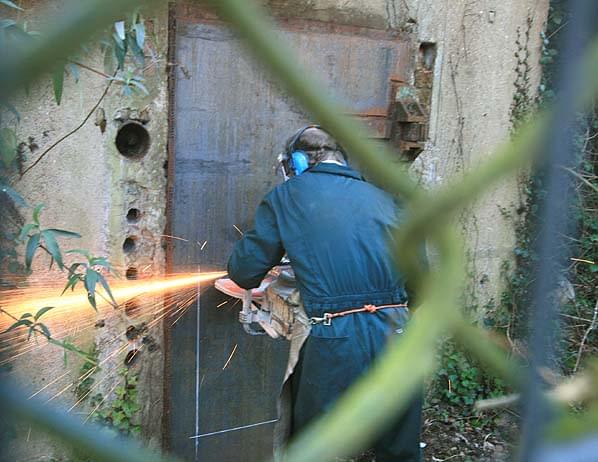 Cutting a panel out of the door to gain access to the tunnels (Nick Catford)
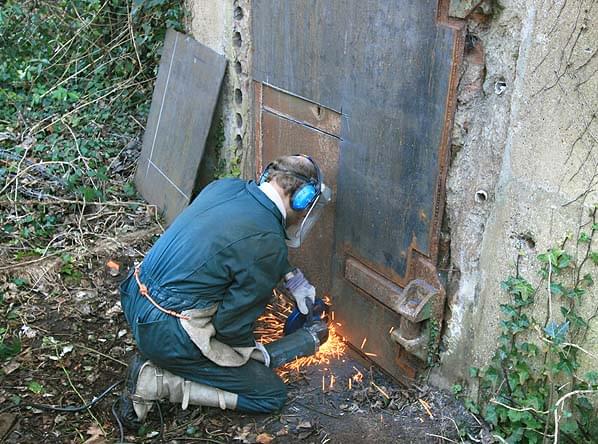 Having removed the first steel panel it was necessary to cut through the original door (Nick Catford)
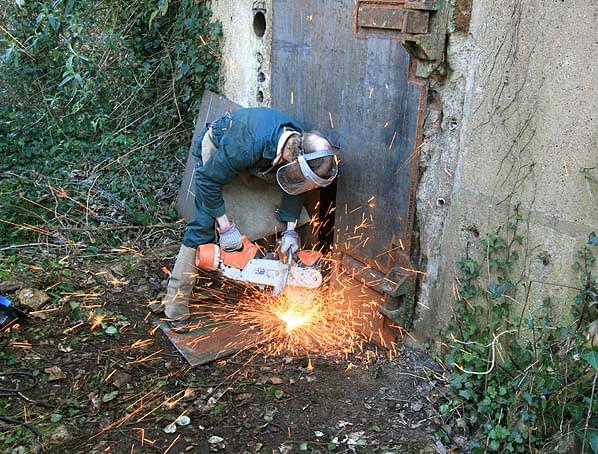 Removing sharp edges before entry (Nick Catford)
 Repairing the door after the visit (Nick Catford)
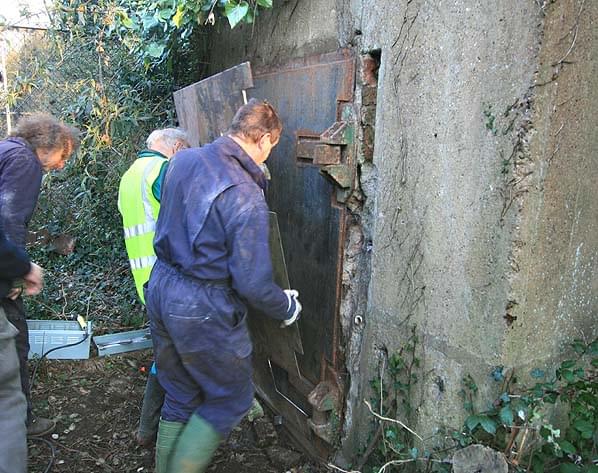 After repairing the door a new steel panel is positioned over the door for added future security (Nick Catford)
 After repairing the door a new steel panel is positioned over the door for added future security (Nick Catford)
 Final positioning of the new door panel before welding (Nick Catford)
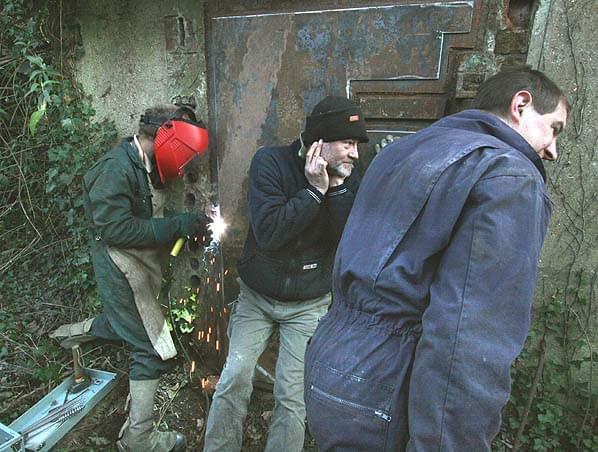 Welding the new door panel in place (Nick Catford)
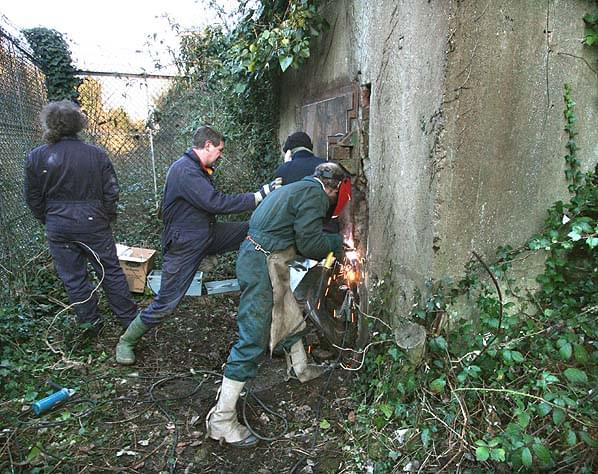 Welding the new door panel in place (Nick Catford)
 A job well done (Nick Catford)
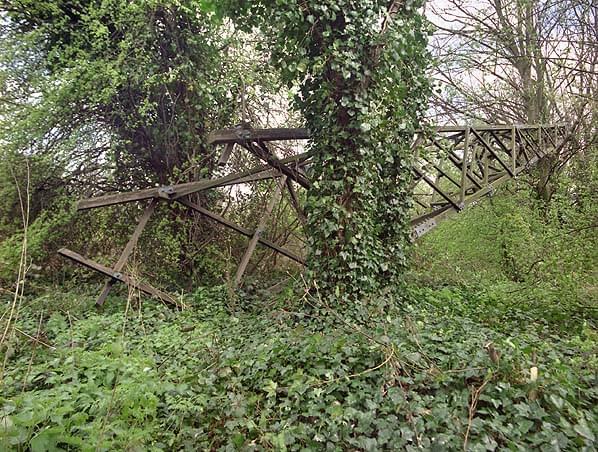 Two wooden aerial masts stood above the tunnels. These were felled in c.1980's but remained on the ground until development of the site by Mid Kent College started. One of the masts is seen here in 1996 (Nick Catford)
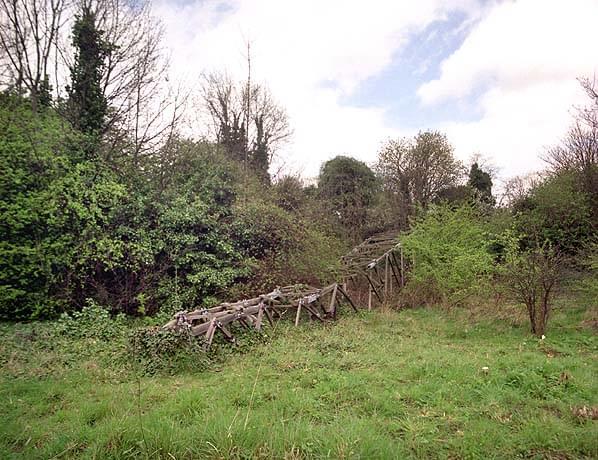 Two wooden aerial masts stood above the tunnels. These were felled in c.1980's but remained on the ground until development of the site by Mid Kent College started. One of the masts is seen here in 1996 (Nick Catford)
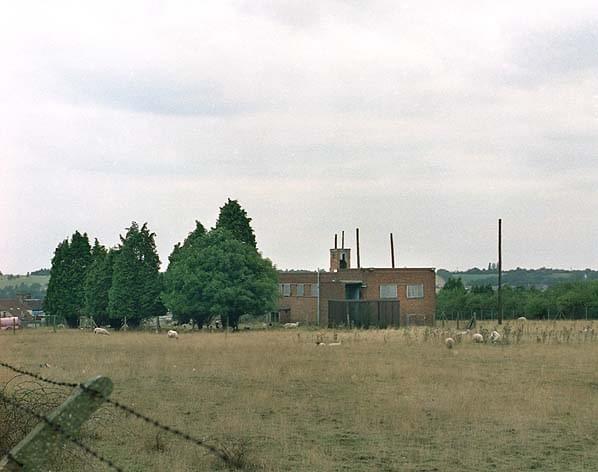 The main Nore radio station was at Beacon Hill, Rochester, seen here in 1996 (Nick Catford)
 The main Nore radio station was at Beacon Hill, Rochester, seen here in 2008 (Nick Catford)
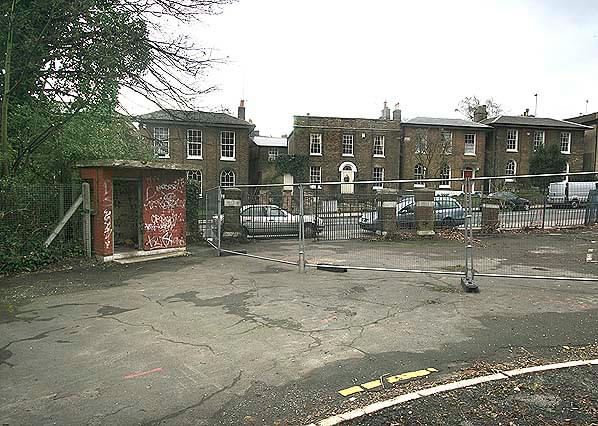 Medway Camp was built c. WW1 on land to the south east of Admiralty House. The main entrance was on Prince Arthur Road (seen here) where a military road (Cumberland Road) gave access to the camp. Note the guard post on the left. The entrance to the Area Combined HQ was behind Medway Camp (Nick Catford)
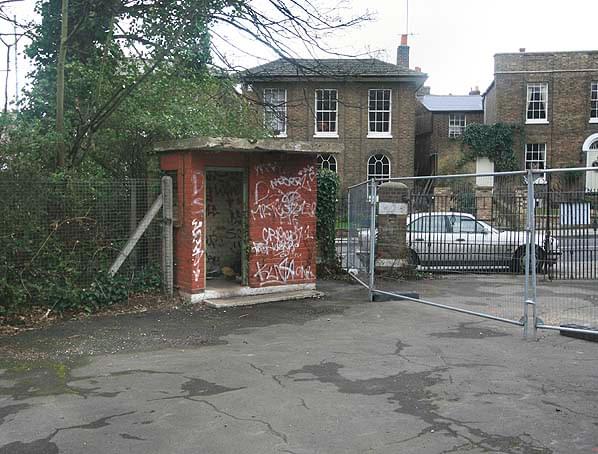 Guard post on Cumberland Road, at the entrance to Medway Camp (2008) (Nick Catford)
 Foundations of some of the buildings at Medway Camp (1996) (Nick Catford)
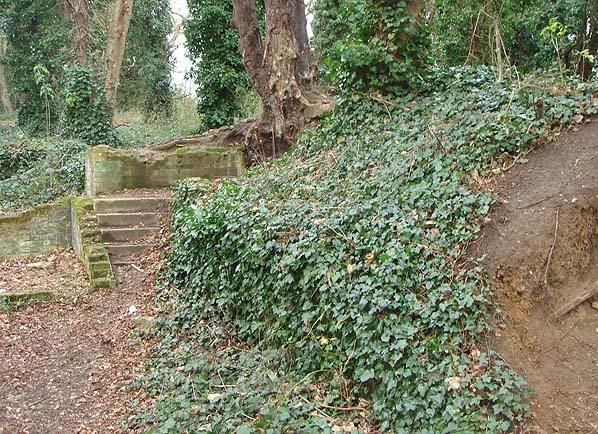 Foundations of some of the buildings at Medway Camp (1996) (Nick Catford)
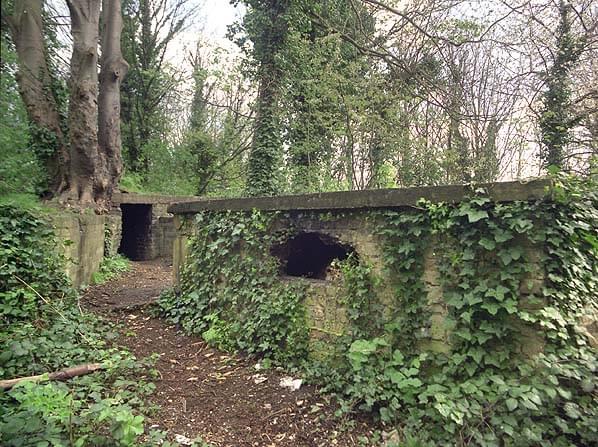 Possible shelter in Medway Camp (1996) (Nick Catford)
 Possible shelter (right) in Medway Camp (1996) (Nick Catford)
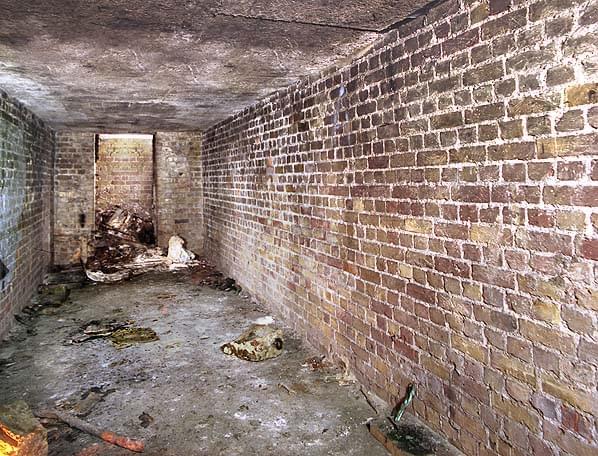 Possible shelter in Medway Camp (1996) (Nick Catford)
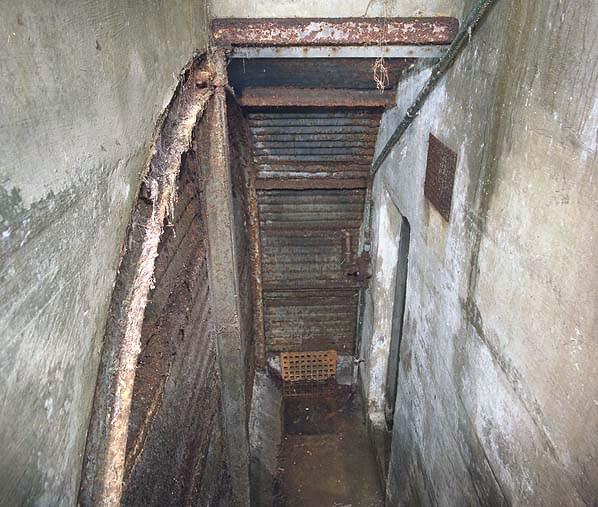 Underground room on the north side of Johnson Avenue close to its intersection with the Lower Lines dry moat. This building has now been demolished and the site redeveloped. There is no obvious connection with the ACH. (1996) (Nick Catford)
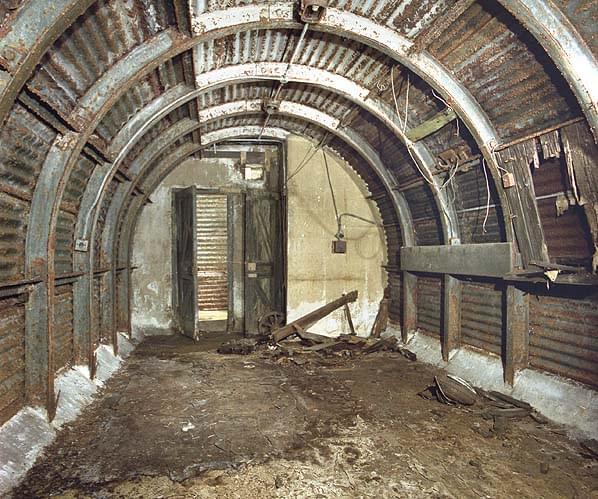 Underground room on the north side of Johnson Avenue close to its intersection with the Lower Lines dry moat. This building has now been demolished and the site redeveloped. There is no obvious connection with the ACH. (1996) (Nick Catford)
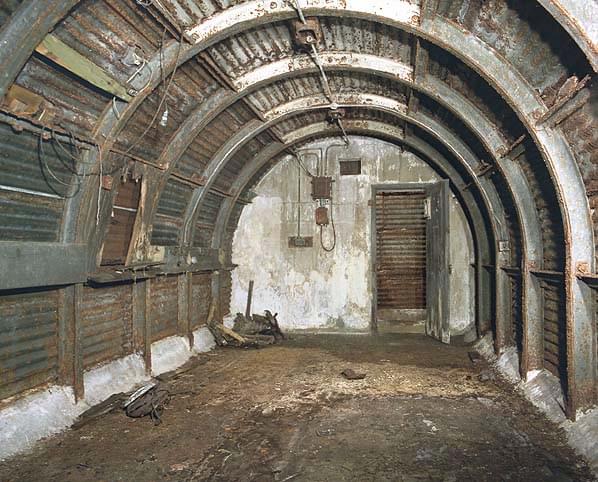 Underground room on the north side of Johnson Avenue close to its intersection with the Lower Lines dry moat. This building has now been demolished and the site redeveloped. There is no obvious connection with the ACH. (1996) (Nick Catford)
Location: 51.395094, 0.544286, OS TQ771693 (Maps: Google, Bing, Aerial View, OldMapsOnline, NLS, OS, Lidar, )